

It has been strongly advised to store data in the cloud so as to get the benefit of retrieving the data anywhere, at any time. So, when planning to move or restructuring your self-managed data to PostgreSQL on AWS, you need to decide which database service suits your needs. The AWS Aurora PostgreSQL helps in Backing up your data, Storing your large data, Scalability, Crash recovery and many more.
The AWS Relational Database Service (RDS) support both AWS RDS for PostgreSQL (which I discuss in link => everythingtechbyisdonobi.hashnode.dev/conne..) and AWS Aurora PostgreSQL.
For this article we will discuss the Amazon Aurora PostgreSQL. So let get started.
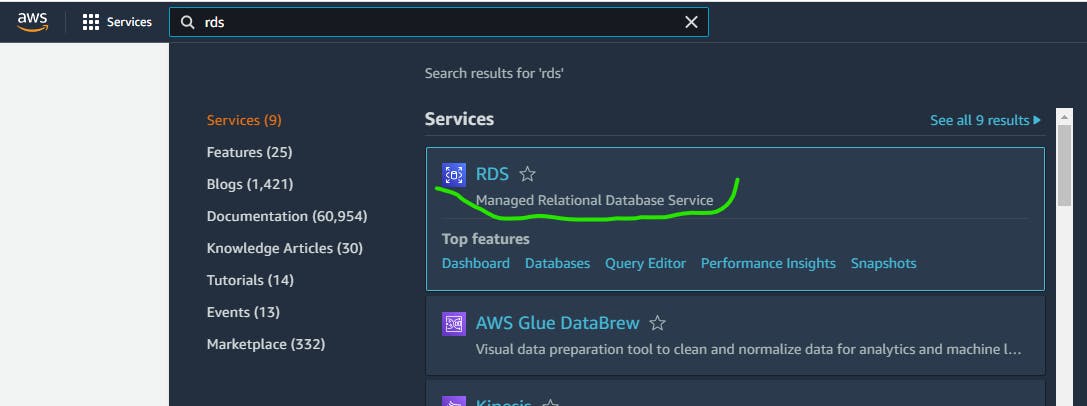
Login to your AWS console, on the search bar type RDS then click on it.
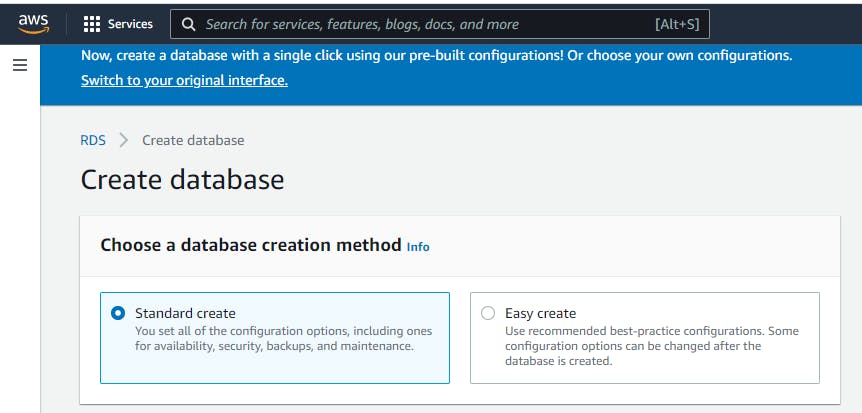
Click on Create Database

There are two options to pick, the first being Standard Create and the second being Easy Create. If you select Easy Create the RDS console will create the database for you and pick some features by default which might have some pricing implications. But for this article we will pick the Standard Create to specify those setting so that we don't get a few hidden cost and you are going to see all the different setting you can pick and I will explain it to you.
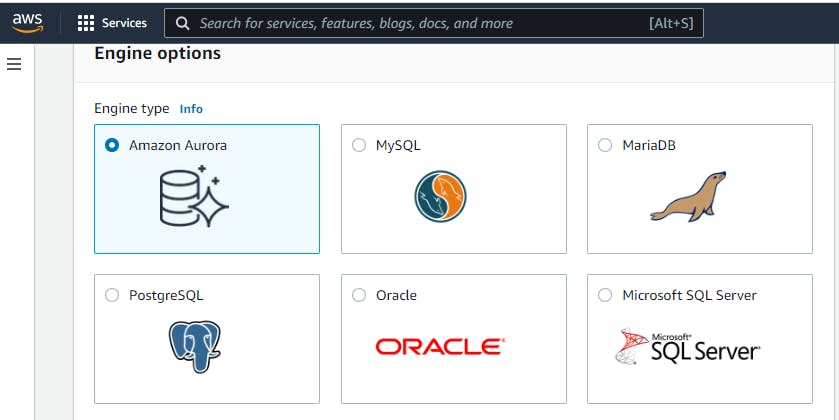
Next its the Engine Option Section where you choose what type of engine you want to use. There are 6 database engine, which are Amazon Aurora (created by amazon), MySQL, MariaDB, PostgreSQL, Oracle, Microsoft SQL Server.
Apart from being a little bit expensive, Aurora gives some added futures that PostgreSQL does not give such as more read replical
So we will be going with Aurora.
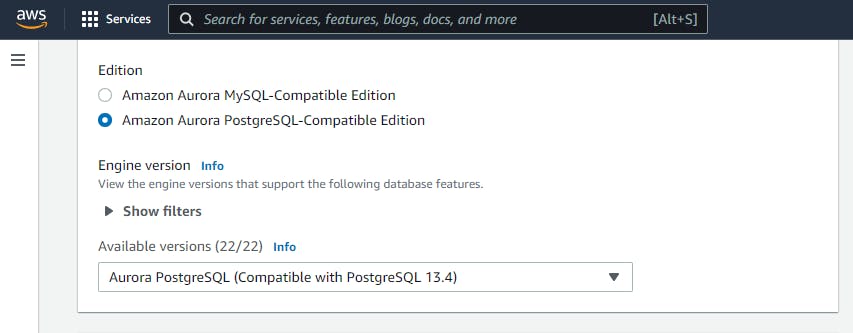
Next you see options under Edition; Amazon Aurora MySQL-Compatible Edition Amazon Aurora PostgreSQL-Compatible Edition
So since these is a tutorial for PostgreSQL we will be picking the Amazon Aurora PostgreSQL-Compatible Edition. Every other thing should be left on default.
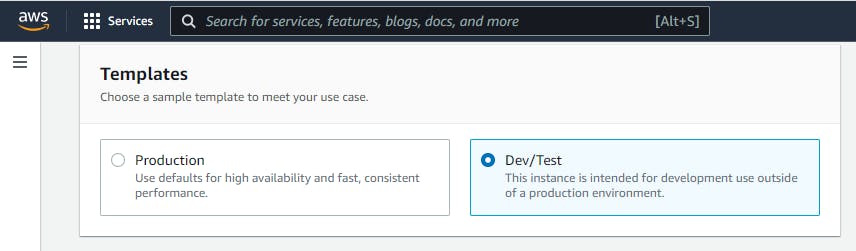
Next is the Template section So for template you can chose from the Production setting or the Dev/Test setting. By enabling the Production setting its going to change a bunch of different settings by default such as high availability and fast, consistent performance. but if you are setting the RDS for production for use case, you need to understand some of this setting.
But we will keep it at DEV/Test to help us with some option we didn't select and help us prevent some cost implication.
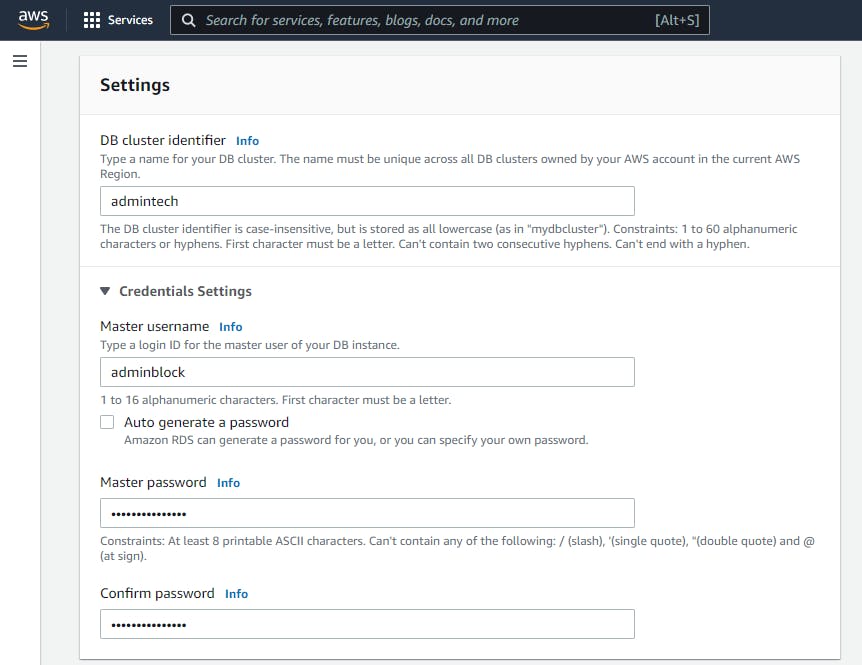
When you scroll down to the Setting of the Database, there is the DB cluster identifier. You can specify your own name, keep in mind that what ever name you pick here is going to be the parent name , more like the name of the cluster. And within a cluster you may have multiple instances most especially in an Aurora clusters, so make the name standout.
Next is the Credentials Settings
You will have to type a Master username, which I suggest it should be different from the default Master username.
For the the Master password type password of your chose which is difficult to guess and confirm it.
Endeavor to keep the password and username because it will be needed to connect the RDS to the Database engine.
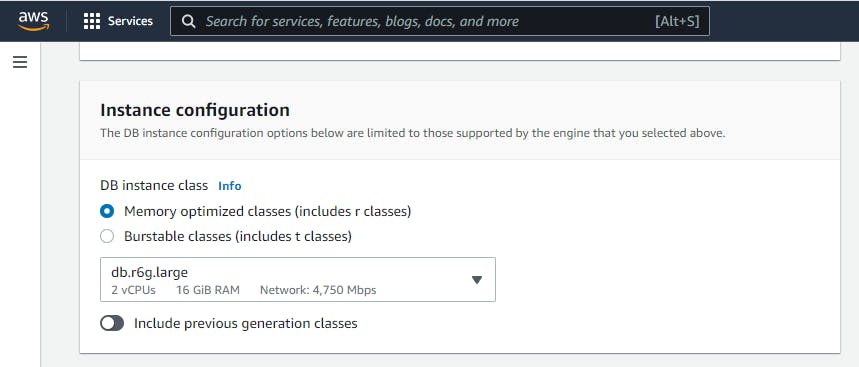
Now move to the Instance configuration
Pick Memory optimized classes (includes r classes) and endeavor to chose the lowest memory space, except for other reasons you can choose other memory space.
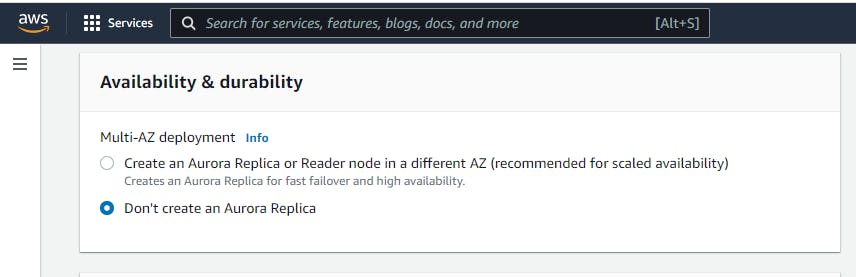
For Availability & durability
This is one of the setting at the top if you had select Production instead of Dev/Test as the Template, it will have select Create an Aurora Replica by default. Now if this have been enable, Aurora will create a reader note in a different availability zone which means that in case there's is an incident in the zone your data is stored, your data is still save. This will attract cost.
but for this tutorial we will pick Don't create an Aurora Replica because we don't have a need for it.
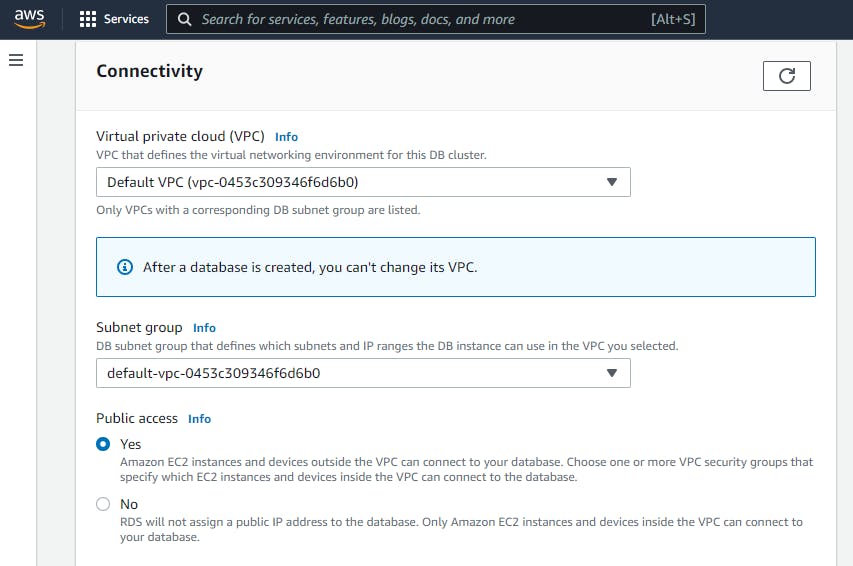
Next we move to Connectivity when you setup a RDS you need to lunch them into the VPS where you are isolated from other AWS customers were they cant have access to anything on your VPC and you cant have access to anything on there VPC, except you give them permission. Its best you go with the default VPC that AWS RDS gives, but if you have a different VPC that your ECS0 is located in please endeavor to lunch in that VPC. Because after the RDS is created you can't change the VPC selection.
Subnet group should be left at default
For Public Access
The default has been selected to No. This is for security reasons so that not every IP address can have access to your data base. So as not to expose your database for the public access. But for this tutorial we will pick Yes so that we can access it from PgAdmn which will give it public access. But make sure that if you are using it for any production use case make sure you come back get it back to NO so that it doesn't get public access.
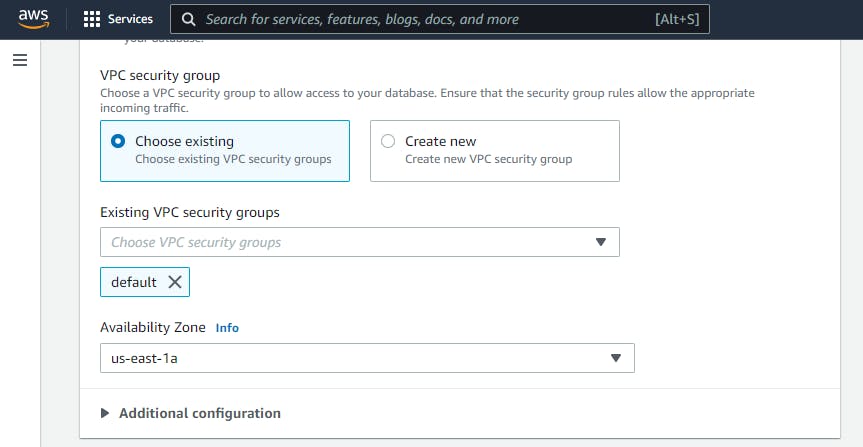
Let scroll down to VPC security group This is more like a firewall that says which traffic is allowed in or out and can be specified right to the port and protocol level. And by default your VPC is going to block all incoming traffic from the public internet and when we try to access the Instance from PgAdmin it will be blocked. But we going to leave this at default and comeback to it and modify it when we get to the PgAdmin environment.
For Availability Zone pick any of the options.
For Additional configuration you might want to put the database on a different port AWS RDS gives that options but in most cases it being left at default.
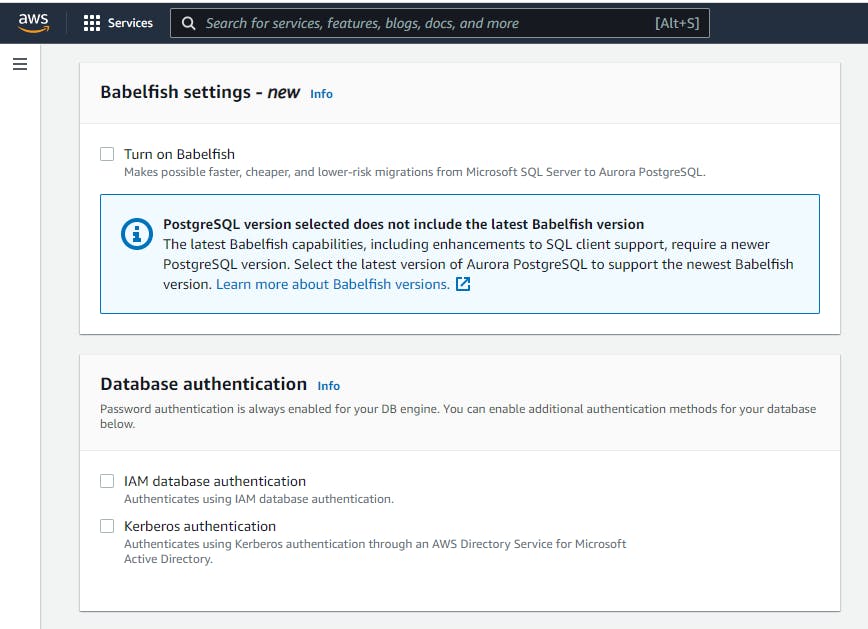
The case of the Babelfish settings leave it at default.
In the case of Database authentication
This part is addition to password authentication, we will leave at default.
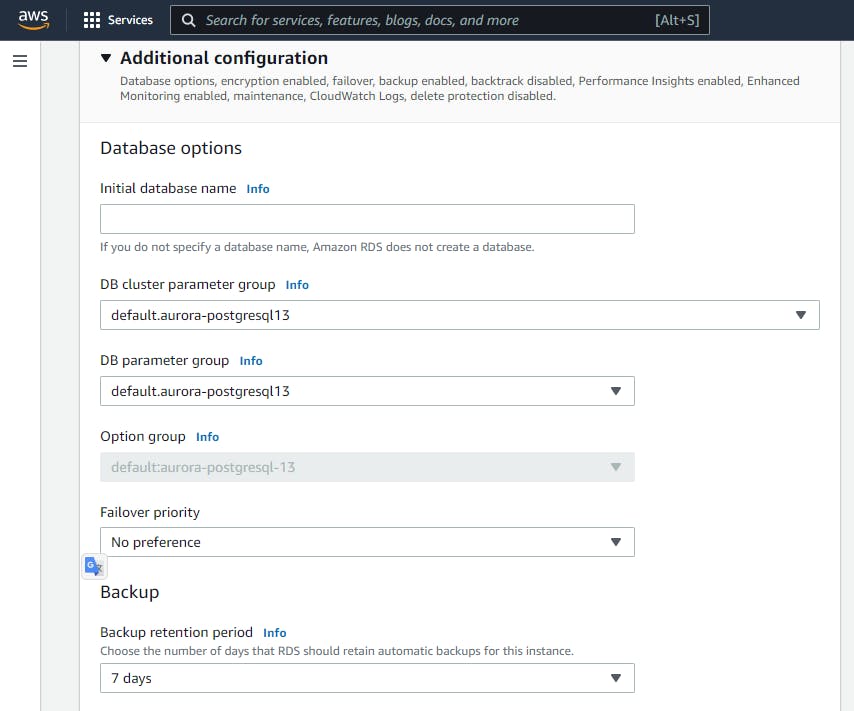
On the last Section before we create our Database is the Additional configuration For the Initial database name I will leave it at default since we will still create one via PgAdmin, but you can create yours here on the AWS RDS console.
DB cluster parameter group, we will leave it at default. But its good you know that this allows you to essentially create a kind of configuration template and apply them to all the database that are in this clusters. You can create your own through a different setting or wizard in the RDS console and anything that lunches into this cluster will have the setting that are specified in the cluster template.
DB parameter group and Option group should be left on default.
For Failover priority we will leave it at No Preferences But its good we know that this is another more advance feature, which allows you to assign different tier to your read replica so that when your primary replica goes down, you can fall over to particular tier of your read replicas. So if you have some kind of preference of which one it will fail over to, you can attach that instance to the associate tier and then select which option you want them to fail over to first.
Moving down to Backup this is just saying how many days your backup should be around. We will leave it at default
Every other thing that follows should be left on default except:
Performance Insights We will disable it. But this is a useful setting that helps you find the root course of issues in terms of database performance or maybe some queries are a little bit slower and you want to know why, this could be a setting for is useful for you to diagnose those kind of use case. Have in mind that there's extra cost for this.
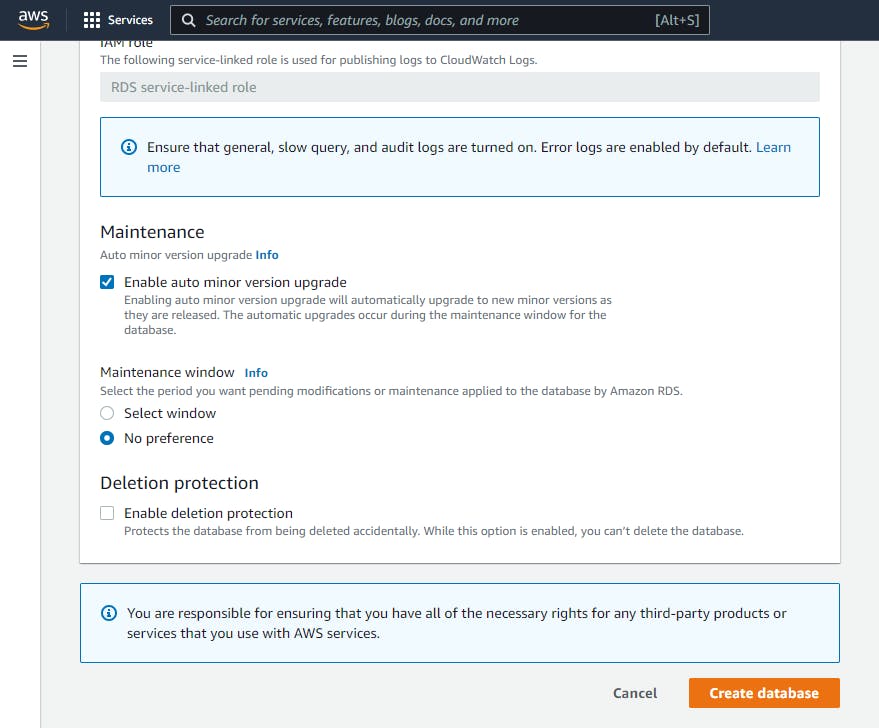
For Monitoring please disable it, because it will attract cost Log exports should be left on default.
The Maintenance section should be left on default.
But as for the Deletion protection. You want to make sure that it is off if you are setting the RDS console for a test. But if this is for a production use case you want to make sure it's enable, which will make sure it cant be deleted except it is disable.
So lets go ahead and click the orange bottom and Create Database
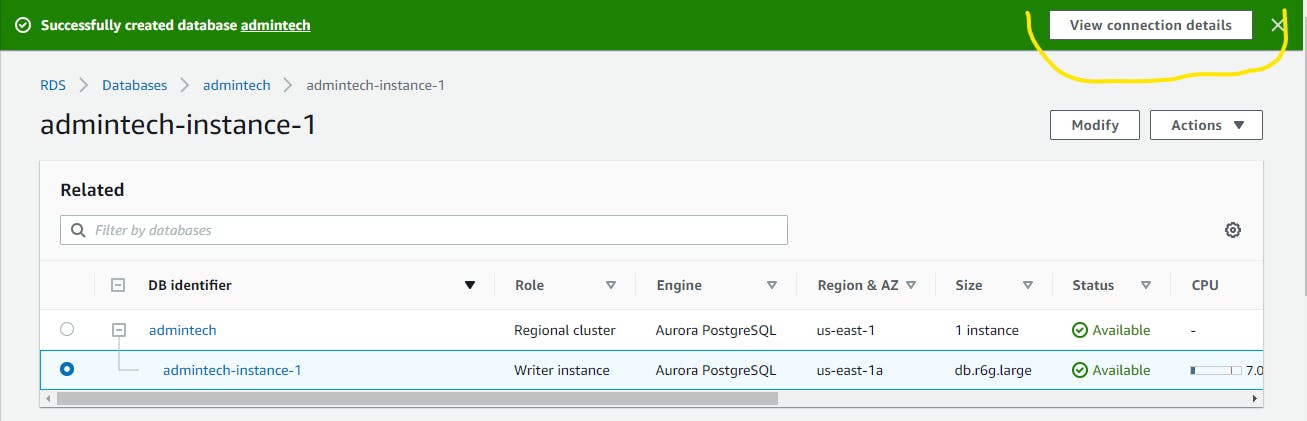
It might take a few minutes to create, but as soon as its done creating it will indicate Available under Status.
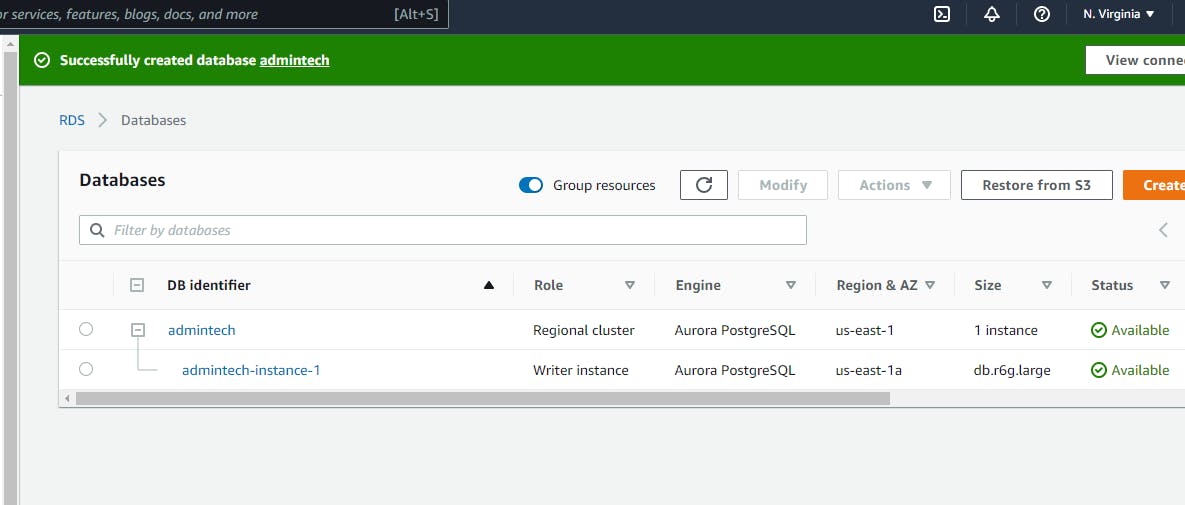 You can see the Database cluster identifier and since we only lunch one instance to the database cluster, its has giving us instance 1 appended to the cluster name.
Give Yourself some Hands of Applause On Creating your AWS Aurora and PostgreSQL RDS

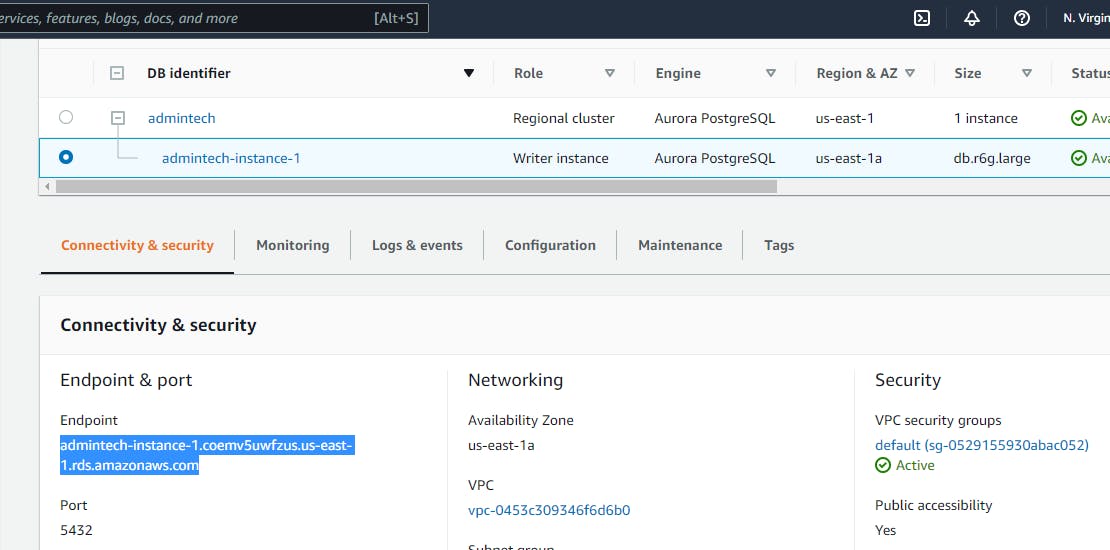
In other to get our instance end point that we can connect from PgAdmin click on the instance.
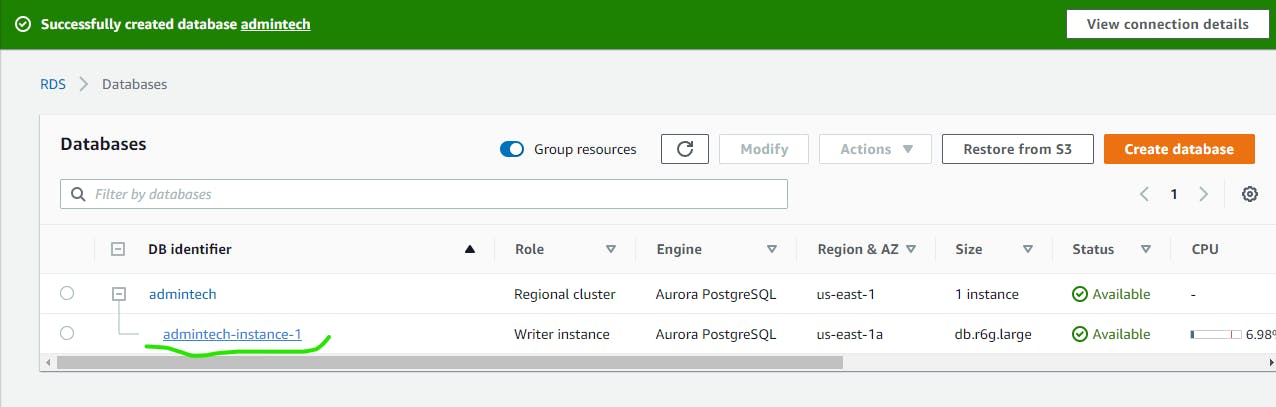
Copy the link under the Endpoint
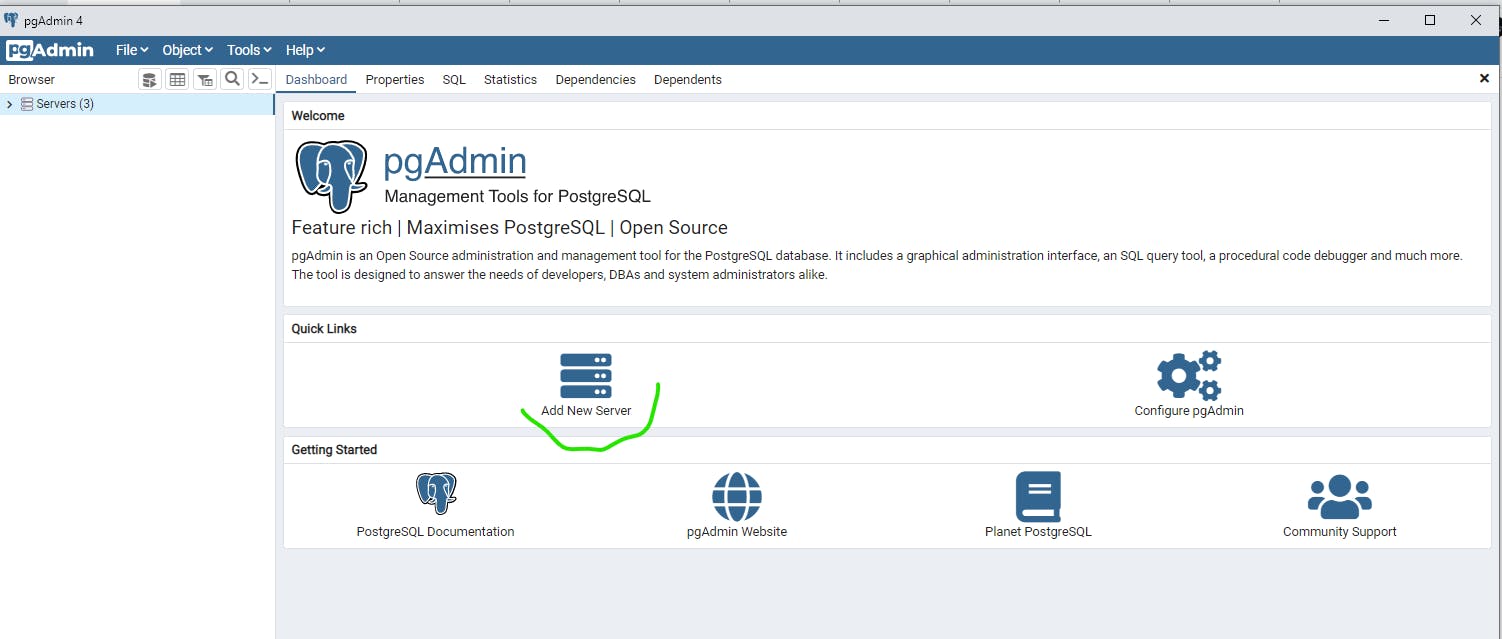
Next go to your PgAdmin environment. And click on Add New Server
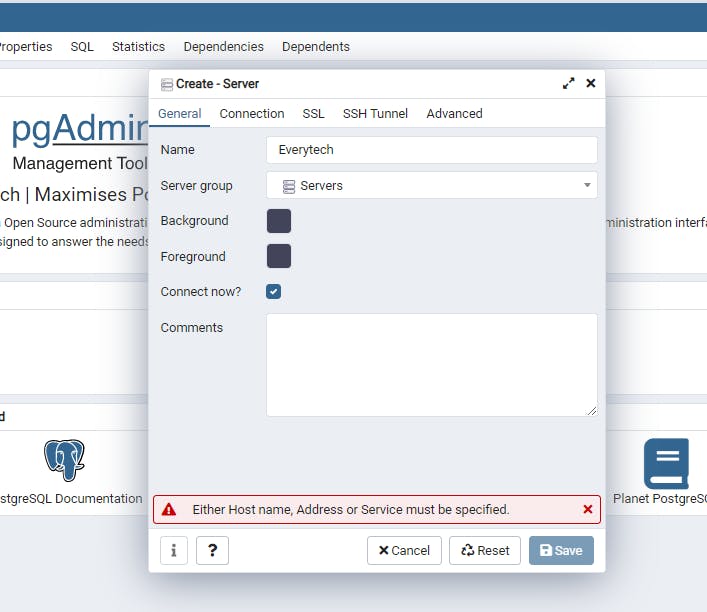
Here under General it will ask, what you will Name the Server, type your preferred name. The rest leave it at default.
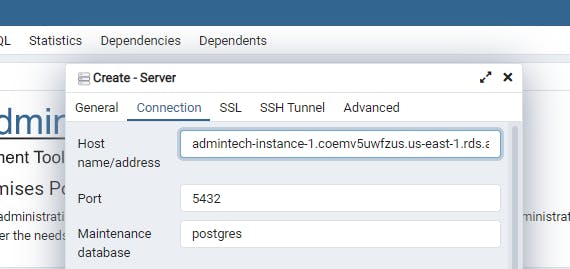
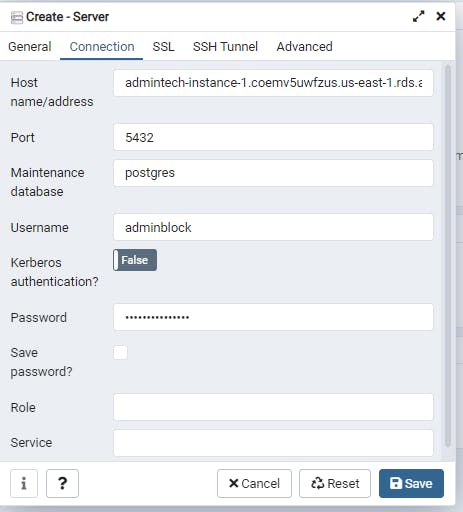
Next move to Connection
On the Host name past the endpoint you copied from the AWS Console Instance
For the Port and Maintenance Database leave at default
For Username and Password go to the AWS Console Instance and click on View Connection details
Next copy the Username and Password which will be inputted on the Username and Password of the Connection section of the PgAdmin
There will be a popup which point to us an issue with our security group. But to get to pass this lets go back to our AWS RDS Console and modify the security group that is associated with our Database.
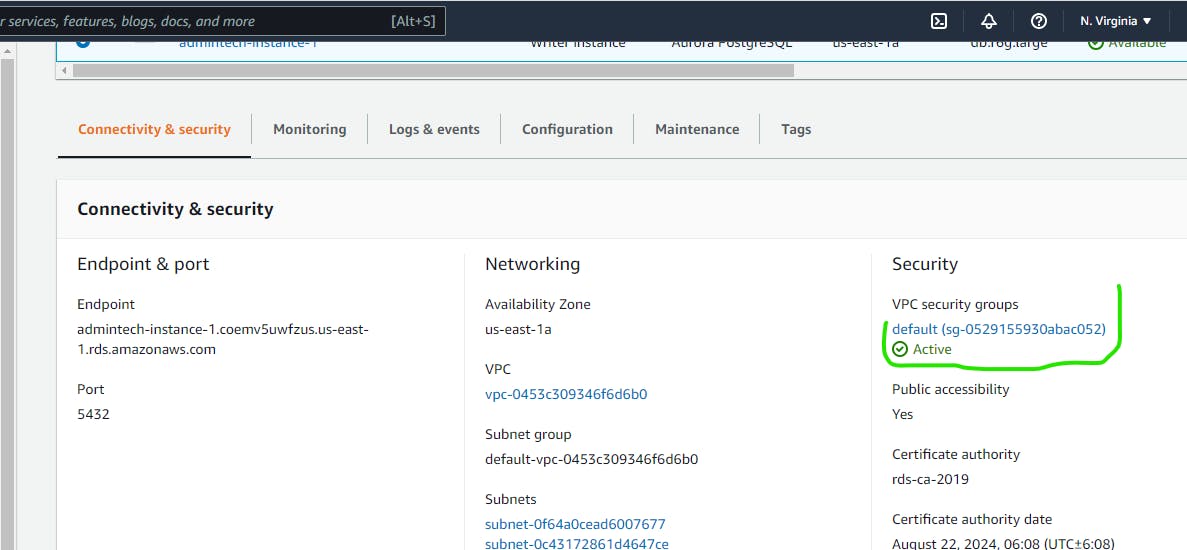
To do this go to your Database Instance click on it and under Connectivity and Security where we got our Endpoint. Look toward left side of the AWS Console under Security you will see VPC security groups link on the link under it, which happen to be the security group associated with this instance.
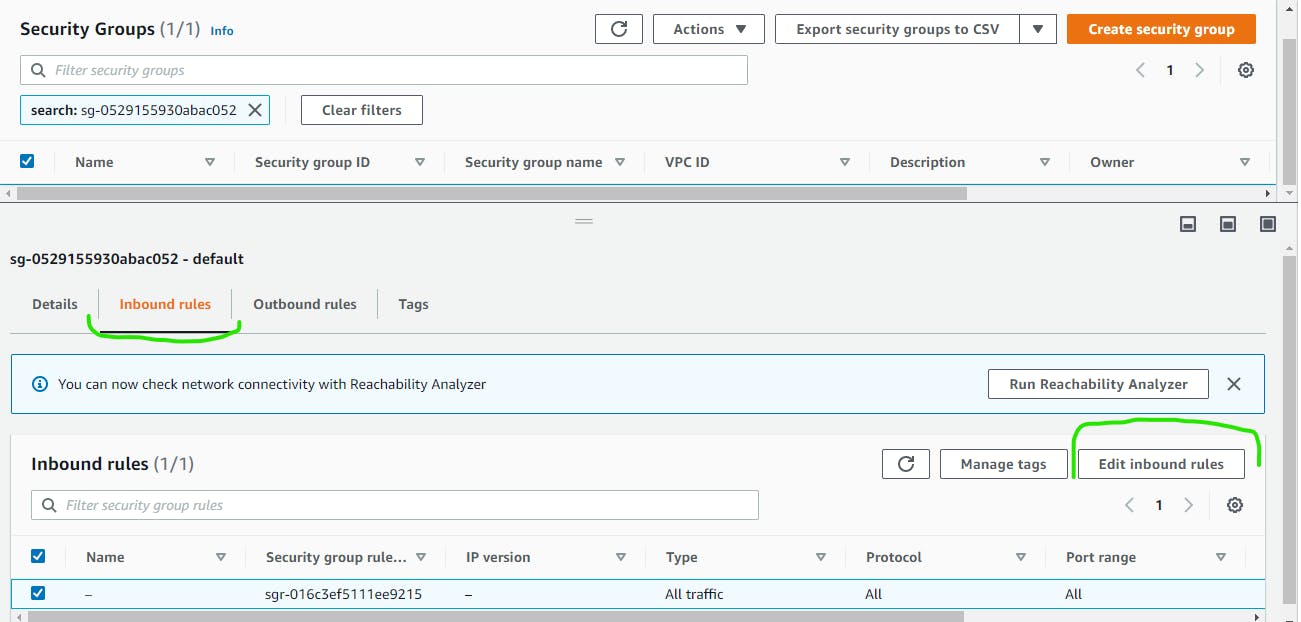
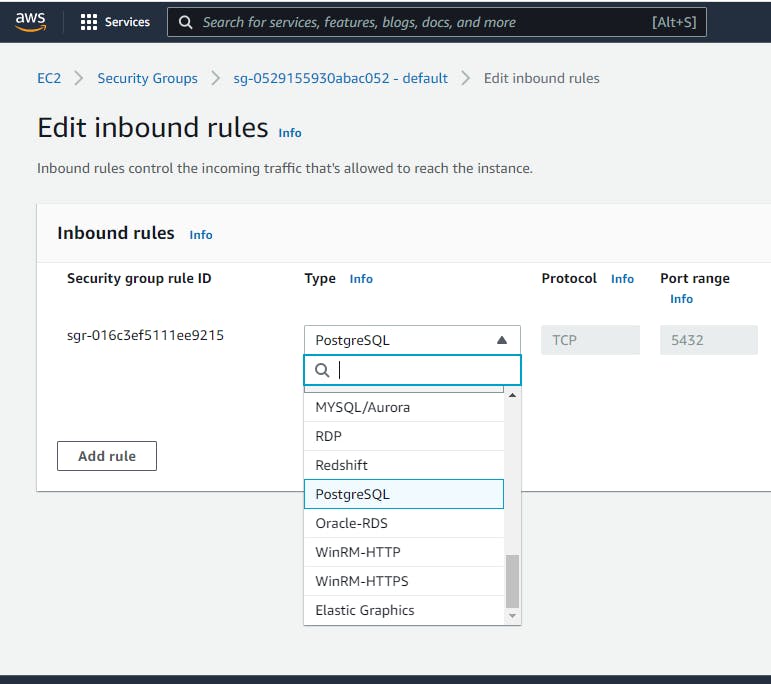
Next click on the Inbound roles on the far right of the screen you will see Edit Inbound Role click on it.
On the Edit inbound rule interface click on All Traffic under Type click and scroll down and pick PostgreSQL.
Next is to specify the rules for the security group in terms of what incoming connection that we want to allow. To do that click on Custom and it's going to bring up some pop-up, Click on IPv4 CIDR. It will put up 0.0.0.0/0 under the search bar.
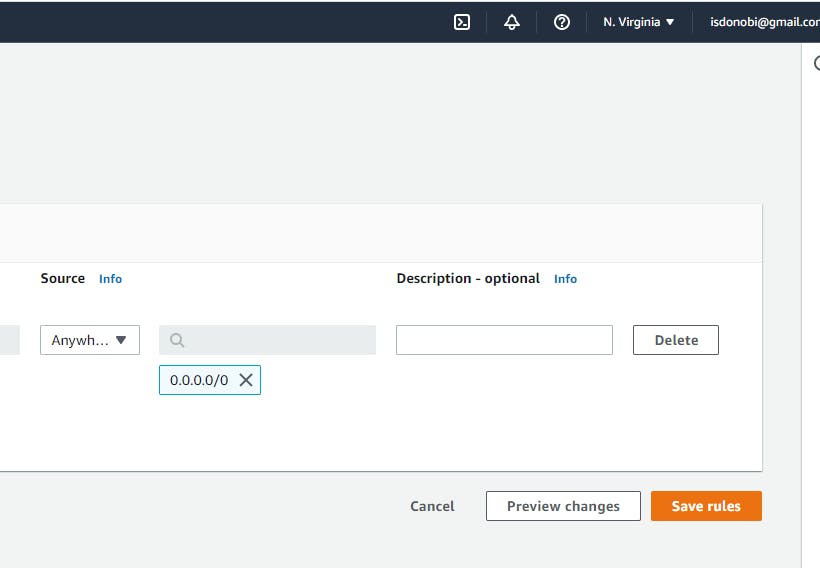
Then click on Add Rule.
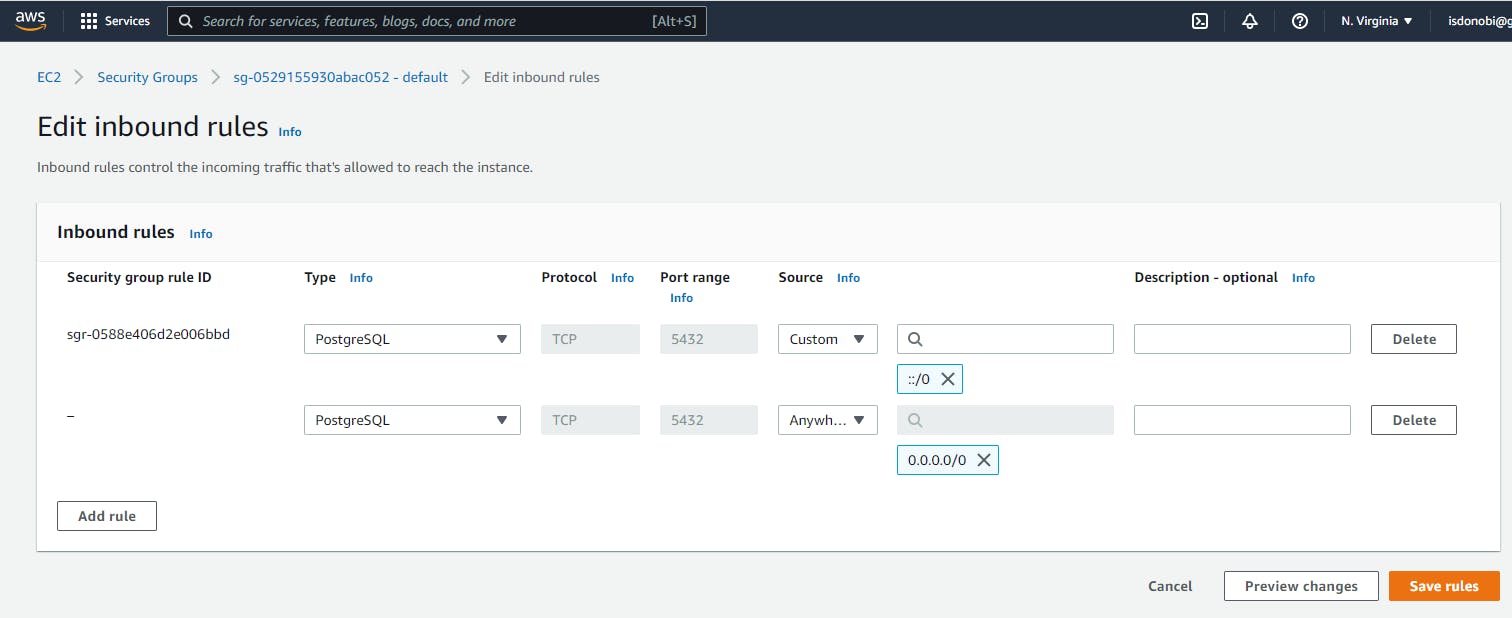
Then Repeat the same pattern which you did earlier. But click on IPv6 CIDR. It will put up ::/0 under the search bar
When done click on Save Rule
 What we are trying to do here is give permission to connect from anywhere on the internet.
Here we can see that the Inbound rule are now save in the Database.

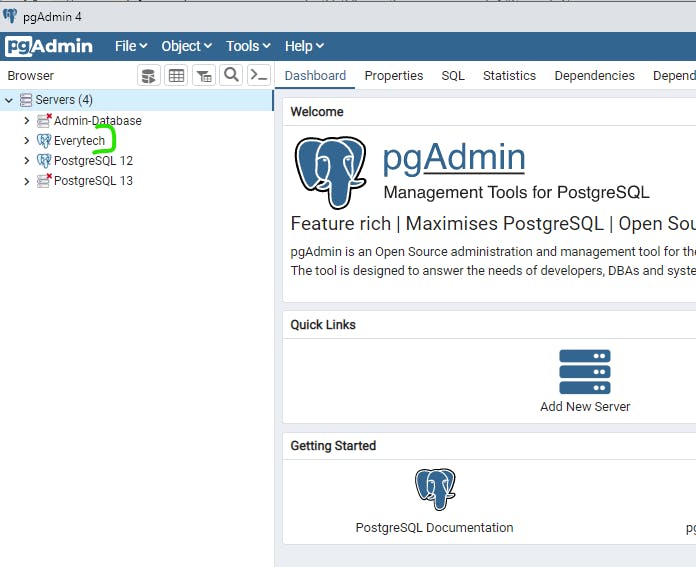
Now lets go to our PgAdmin environment and Click SAVE
Now the PgAdmin is conncect to the AWS RDS
Congratulations on Creating your AWS RDS and Connecting it to Aurora and PostgreSQL.