


A data base is a standardized collection of data, which is stored and access electronically. With the help of database, data management is easy. Small database can be stored on a file storage, while large database are hosted on computer clusters or Cloud storage. With the world now shifting everything to the cloud space due to the expenses of running a physical server. There is more need in integrating every part of information technology into the cloud space. Data is getting enormous by the day, enterprise need to look for an easy way out, to store data and process it. That’s where cloud servers like the AWS comes in. In this article we will talk about how you can connect your AWS Console to your Database Management System. The AWS Console has what it called RDS (Relational Database Service) this is the part of the AWS Console where it simplifies the setup, operation, and scaling of a relational database for use. The administration process such as patching the database software, backing up databases and enabling point-in-time recovery are been manage by the server automatically. With the help of the AWS Control plane on-demand it will help in scaling storage and compute resources which can be perform with a single API.
Why PostgreSQL? You may ask. Well PostgreSQL is an open-source relational database management system emphasizing extensibility and SQL compliance. PostgreSQL is considered the most advance and powerful SQL compliance, its widely use by most data analyst and scientist to query data, its also an effective way for developers to build the most complex applications, run administrative task and create integral environments.
To start with lets go to our AWS platform
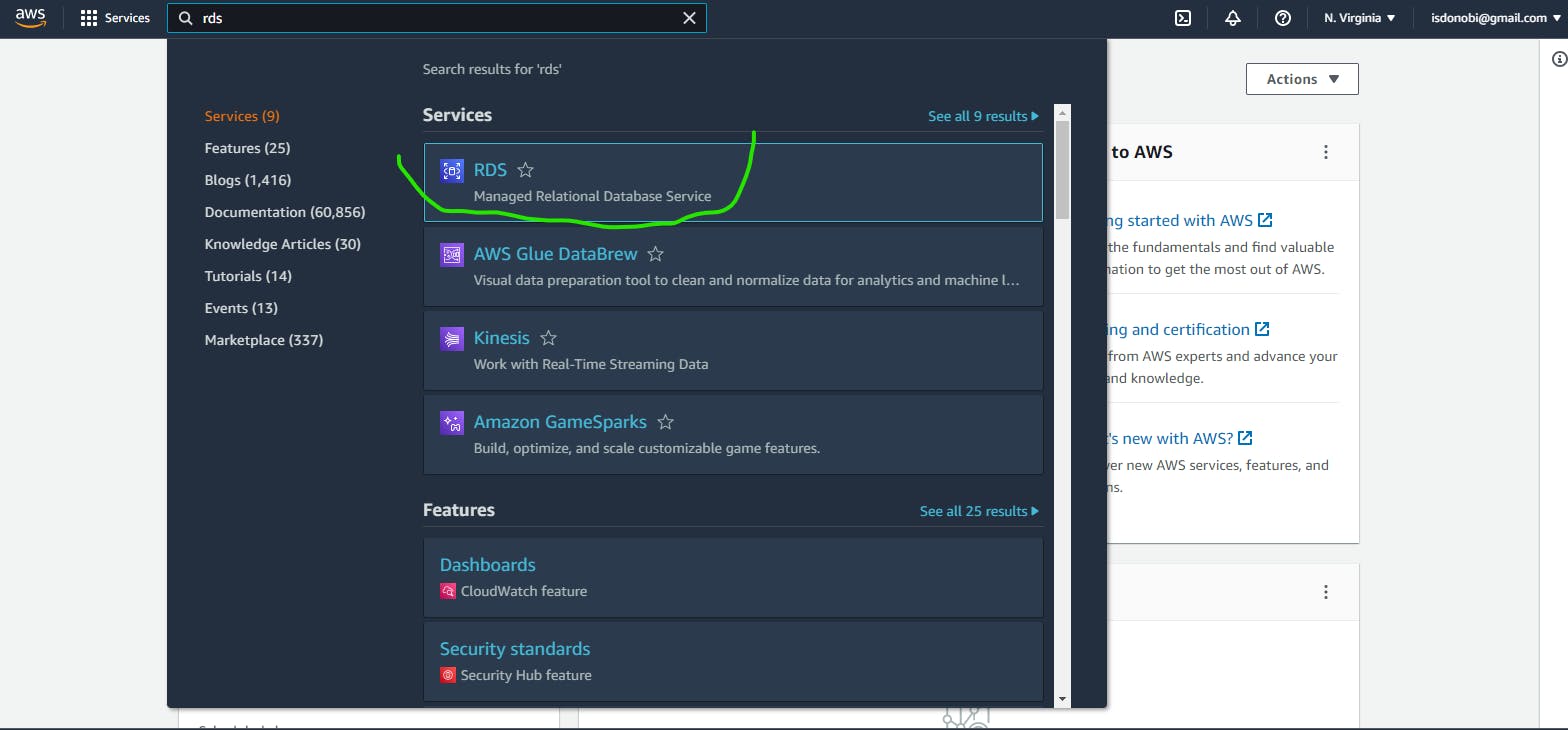
Go to your Search bar on your AWS Console and type RDS
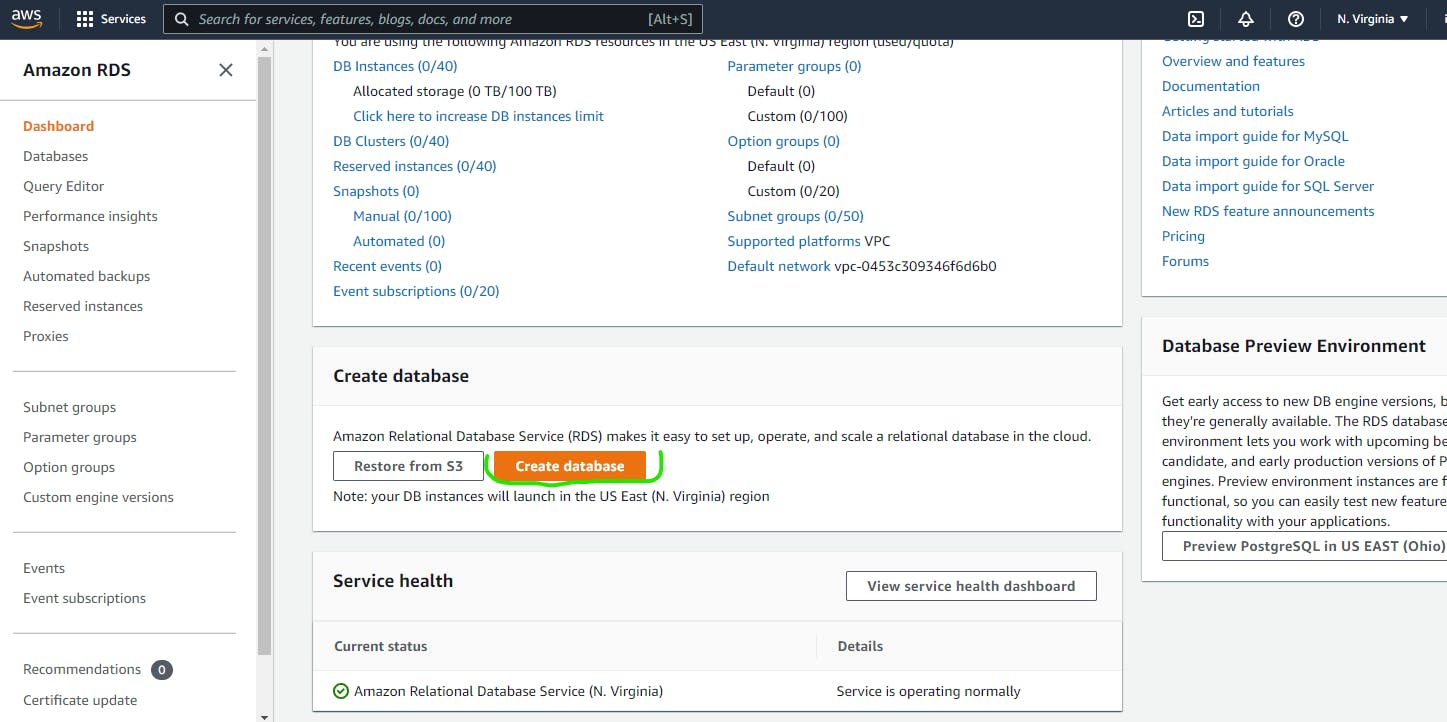
After clicking on the RDS, it will take you to another page. Scroll down and click on Create RDS
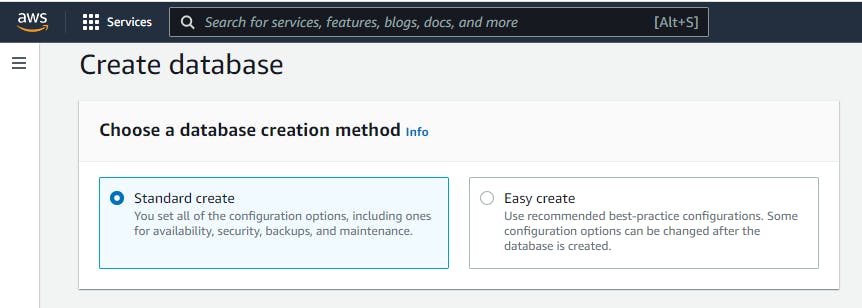
What you will see next is which Database creation method to pick from. It's best to go with the Standard Creation method, this is because the standard creation method helps to give you an options to specify which setting you will pick and to prevent hidden cost later on. Then there is the easy method in which things are been set up for you automatically, this is a good idea if you are just starting on and don't really care about any settings but it is good you know there might be pricing implications if you enable certain features that enable pricing cost.
But for this article we will pick Standard Creation
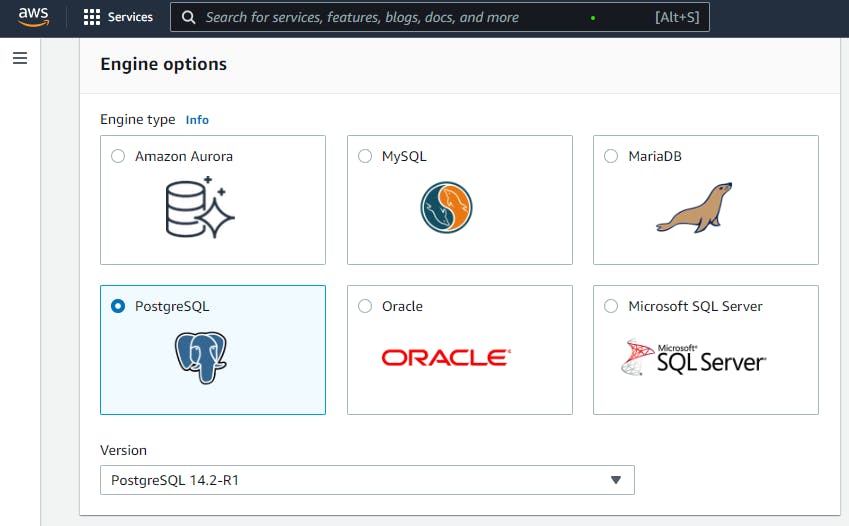
Now AWS have 6 Database Engine options, but we are going with the PostgreSQL. And for the Version you could leave it on default or chose the latest version.
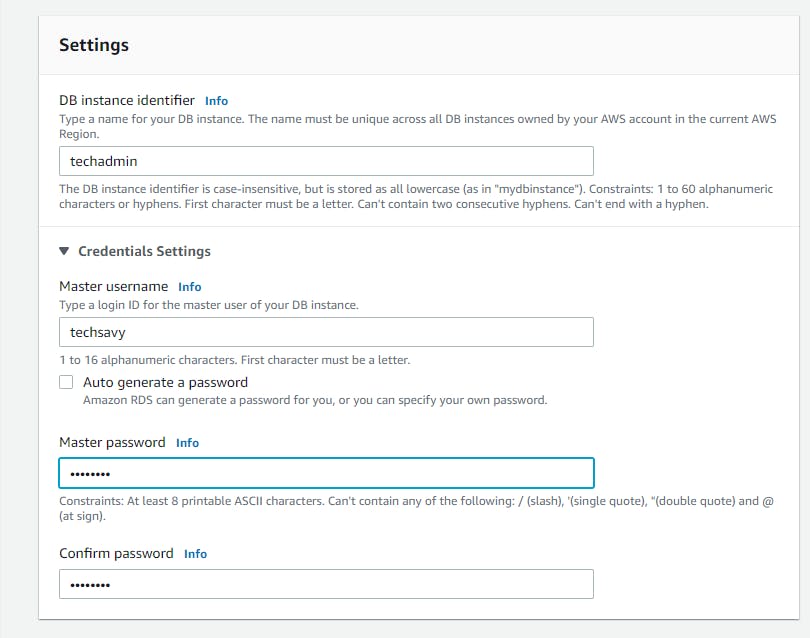
Give your DB Instance a name of your choosing. Have in mind that whatever name you give your DB instance it's going to be the cluster name.
Next the Credentials Settings chose a Master Username and a Master Password and then confirm the Password
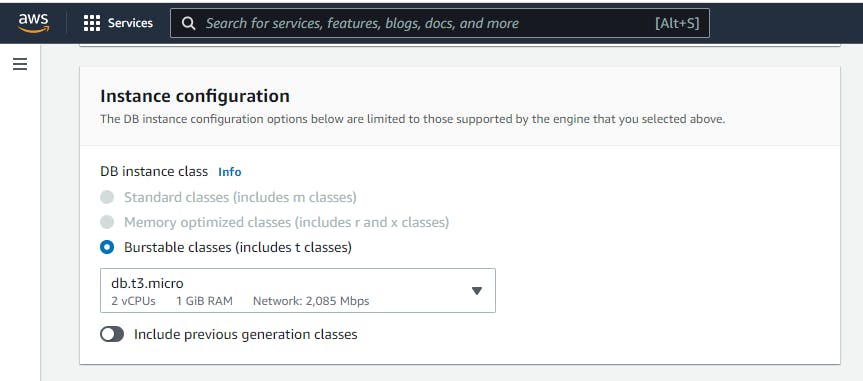
For the Instance configuration we will leave it at default
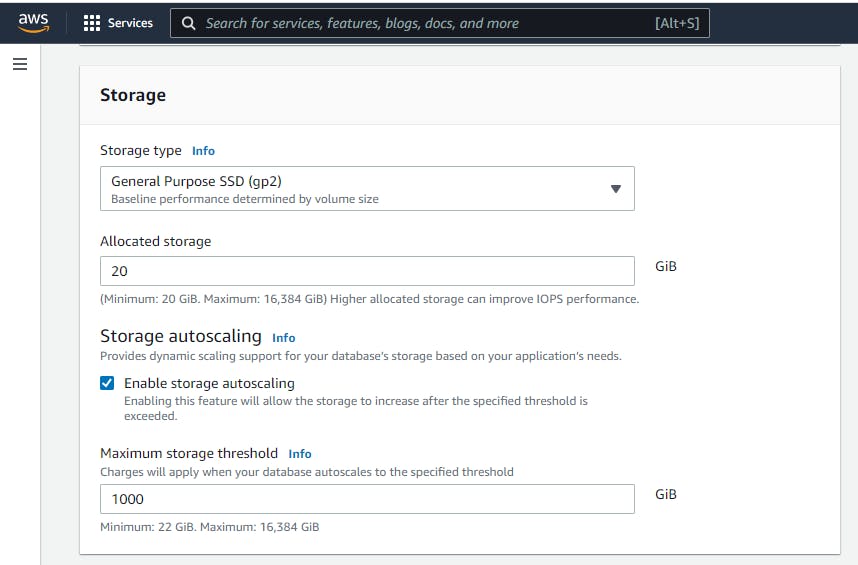
For Storage we will leave it at default
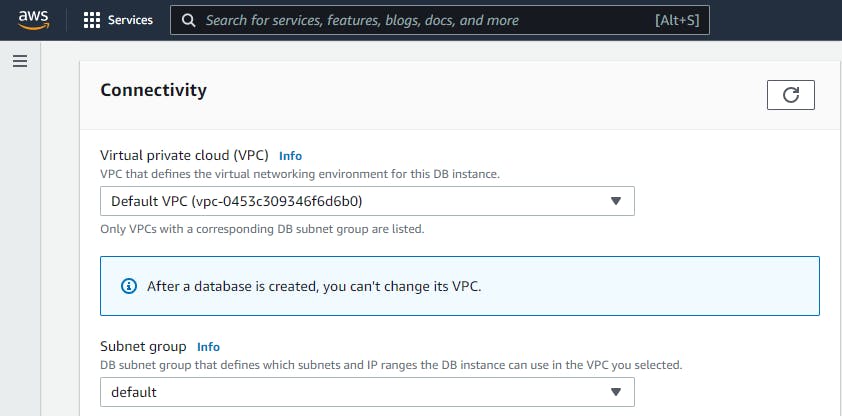
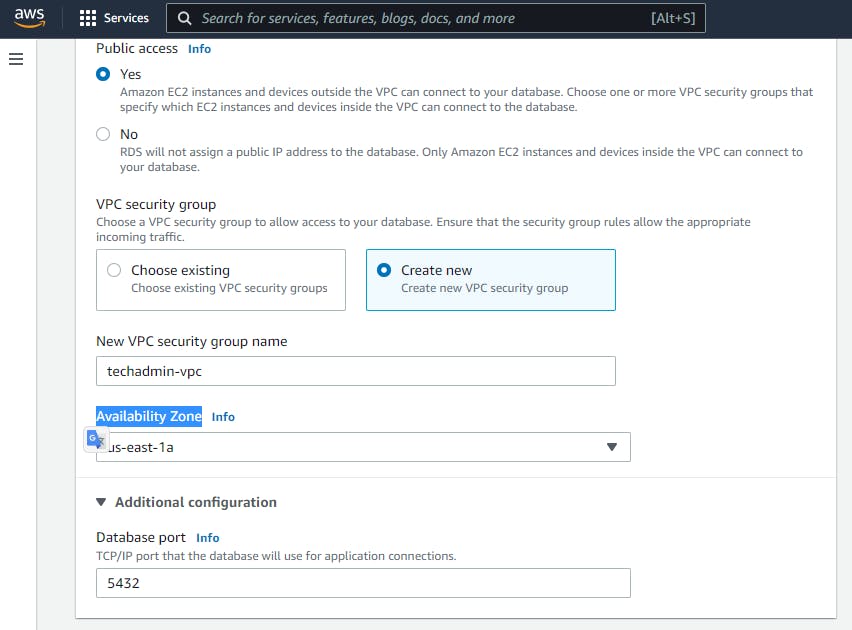
For Connectivity,
The Virtual private cloud (VPC) should be left at default for the purpose of this article. While keeping in mind that whether you pick the default VPC or Create a new VPC, it cant be change as stated in the RDS console.
Subnet Group should also be left at default.
Public Access which should be left at NO in other to prevent access from other users. But for the sake of this article we are going to leave it at YES.
Also the VPC security group choose Create New.
For a name to your New VPC Security Group.
For the Available Zone pick anyone as this is just where you prefer your data to be stored
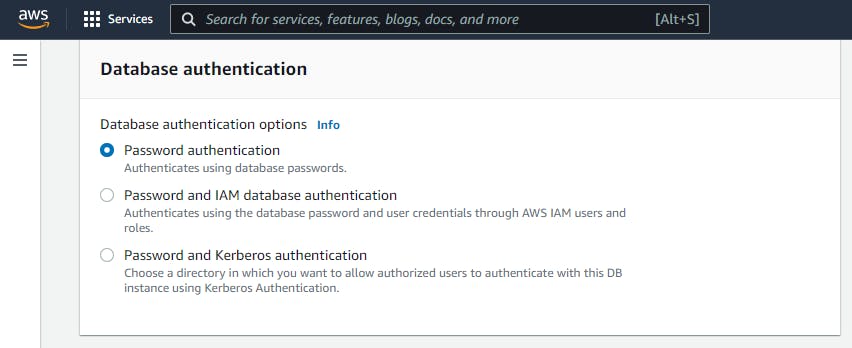
Database authentication leave it at default
For Additional Configuration
choose a Initial database name.
Every other thing under Additional Configuration should be left on default.
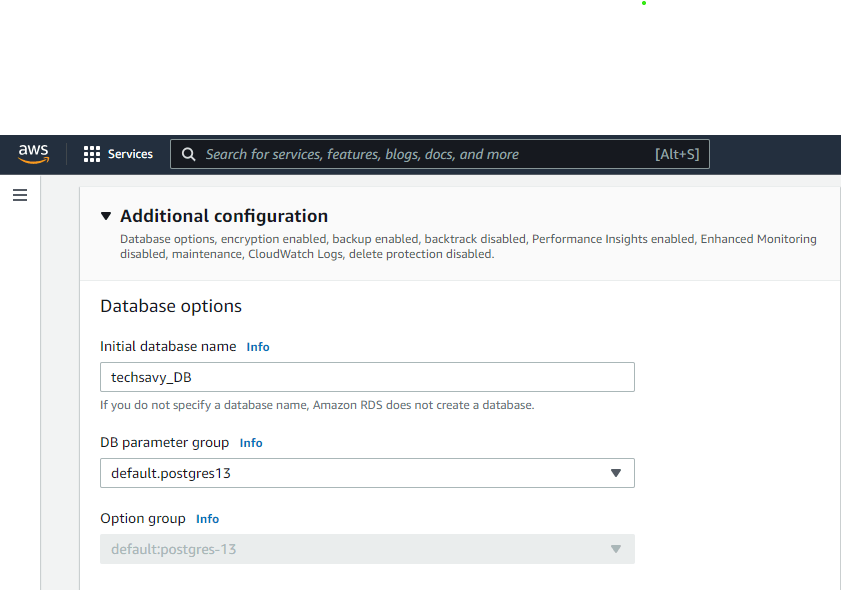
NB: In the case of the deletion protection; if you want to protect your data from being deleted click on the checkbox. This is necessary when you are not the only one using the database machine but want to prevent the data from being deleted.
Now scroll down and click on Create
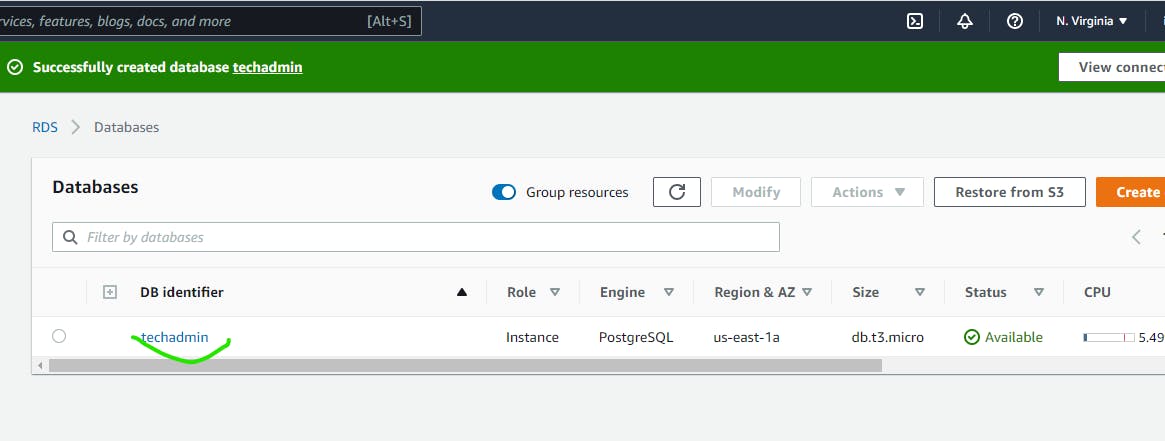
Now this might take a few minutes but be patient its in the process of creating. But once created it will show Available
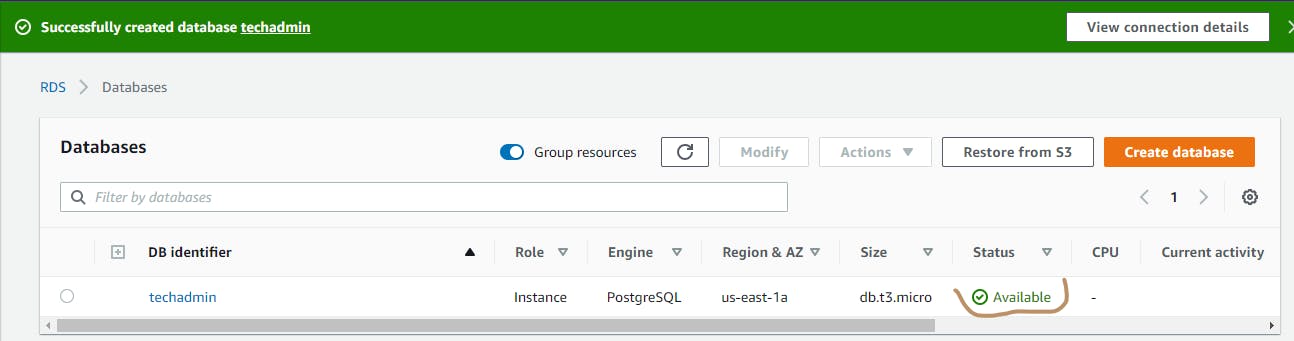
Congratulation

You've created your RDS
Now lets move to the PostgreSQL environment and connect the AWS database serve to the database engine. If you don't have PostgreSQL kindly use this link postgresql.org/download and download postgreSQL.
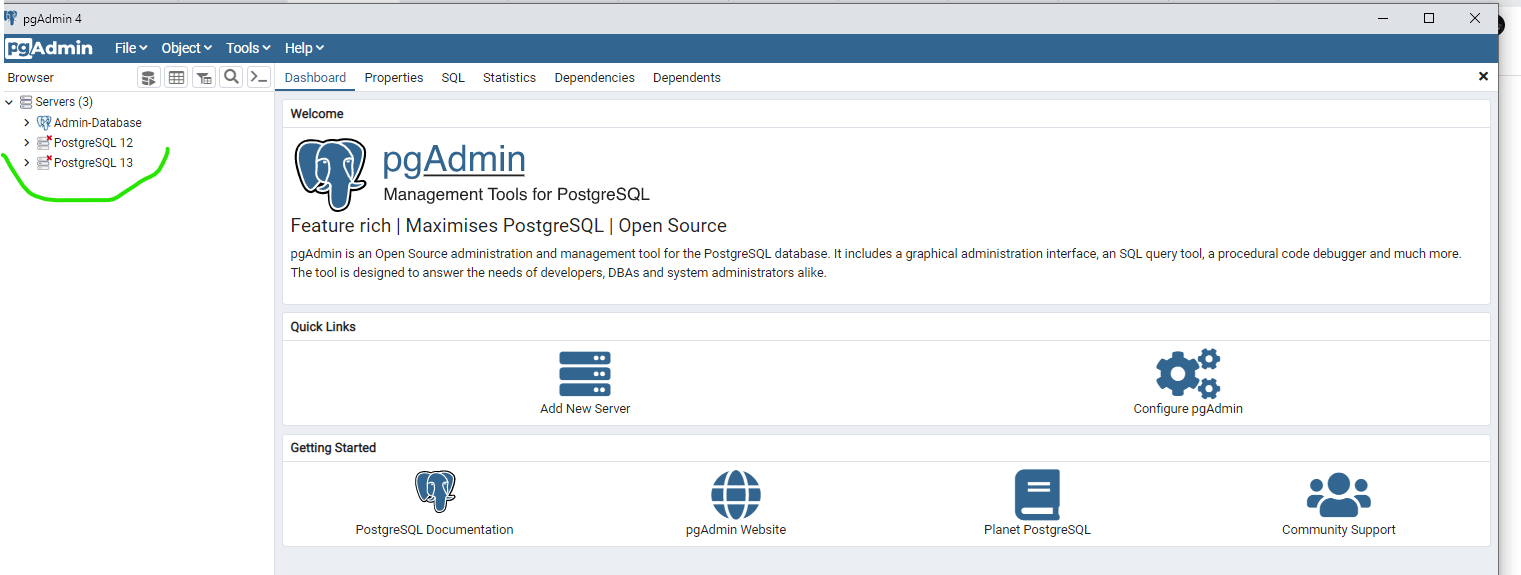
This is the PostgreeSQL/PgAdmin environment.
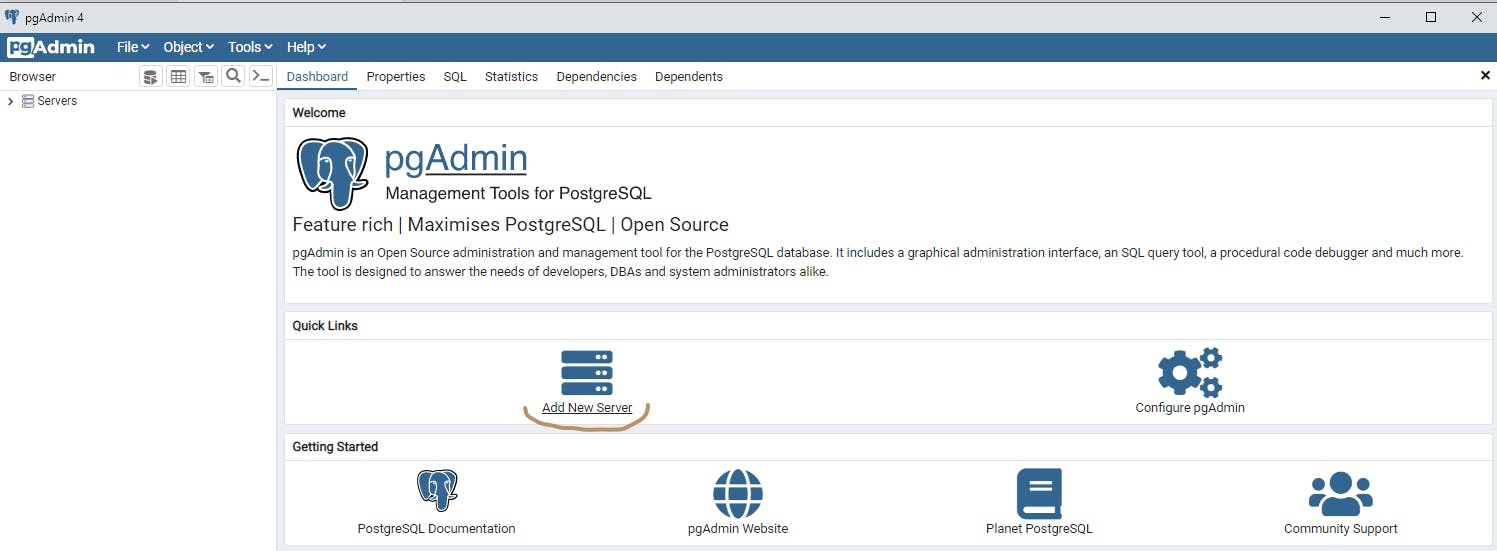
Next Click on Add New Server
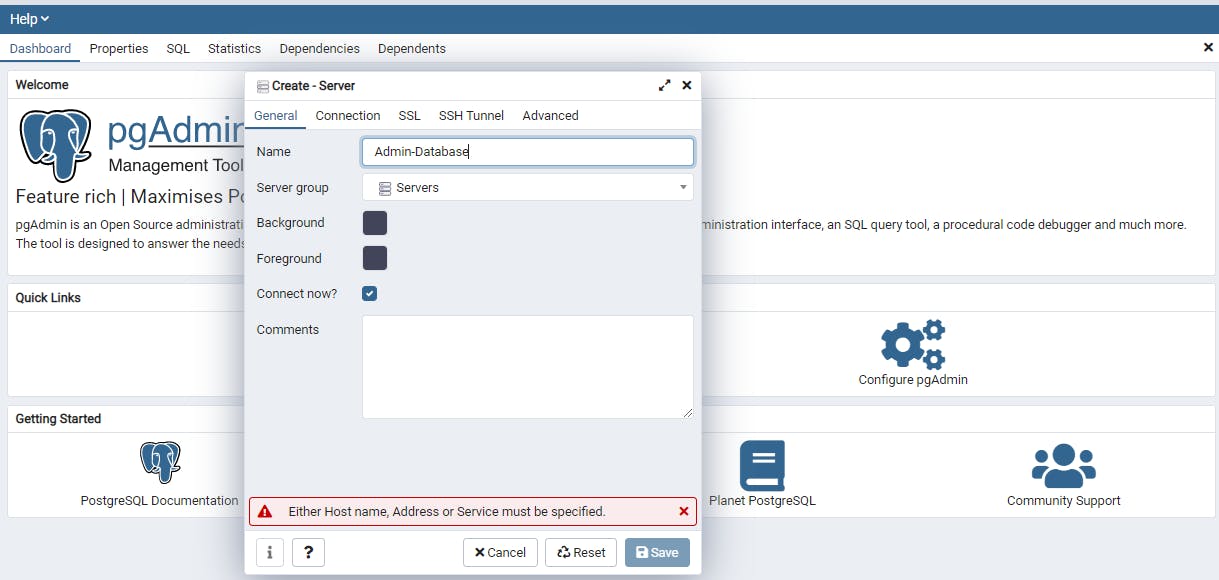
On General
Name; give a name of your choice
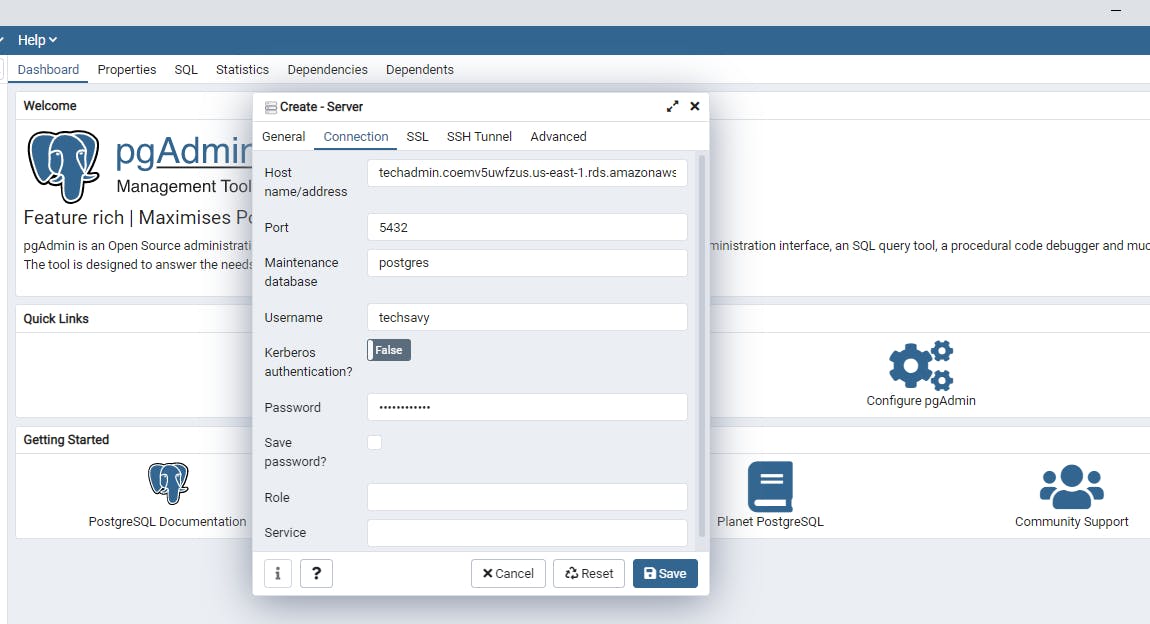
Next click on Connection
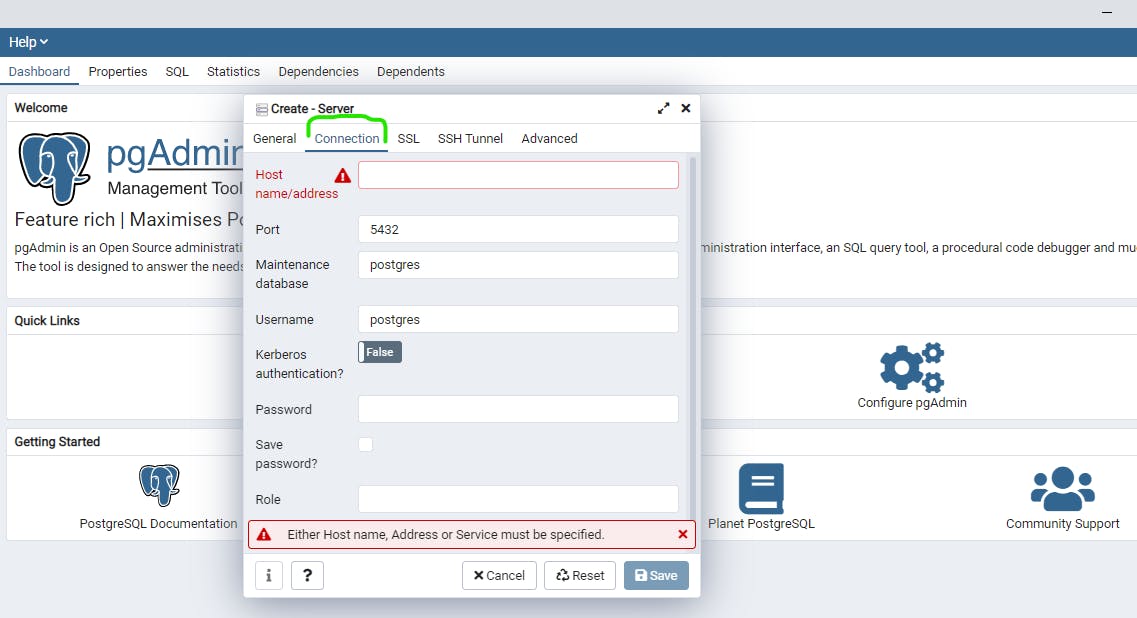
To get the Host Name/address go back to the AWS Console, on AWS RDS click on DB identifier (techadmin). Click on view connection details.
Copy the Endpoint link and make sure the port correspond to the one on PgAdmin
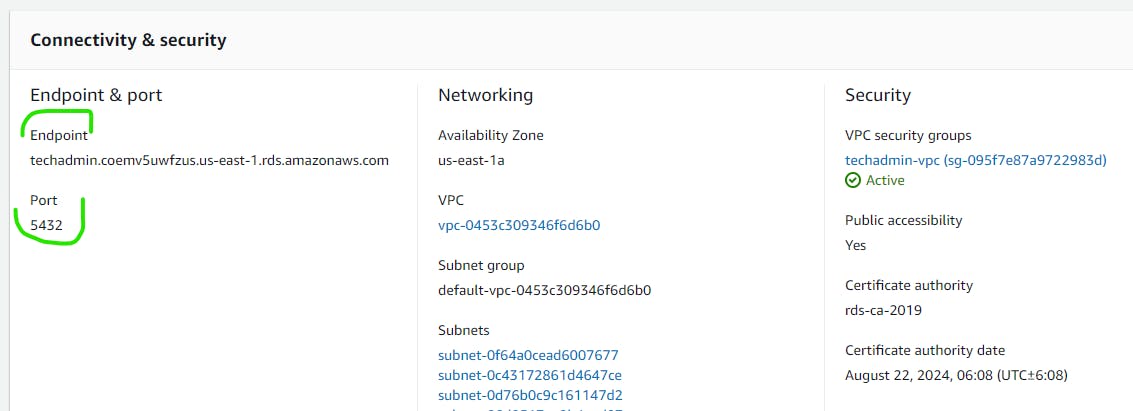
Go back to your PgAdmin and paste what you've copied on the Host Name/Address
For maintenance database leave it on default
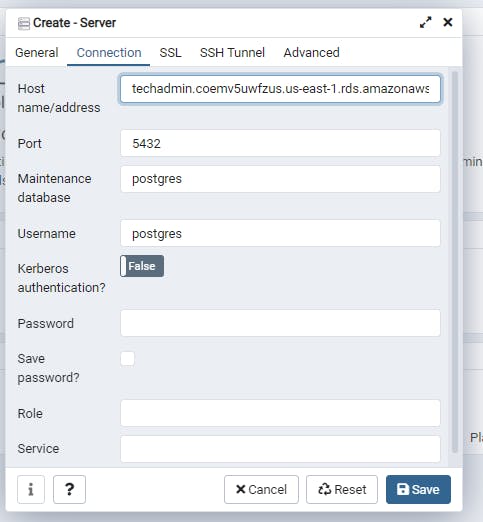
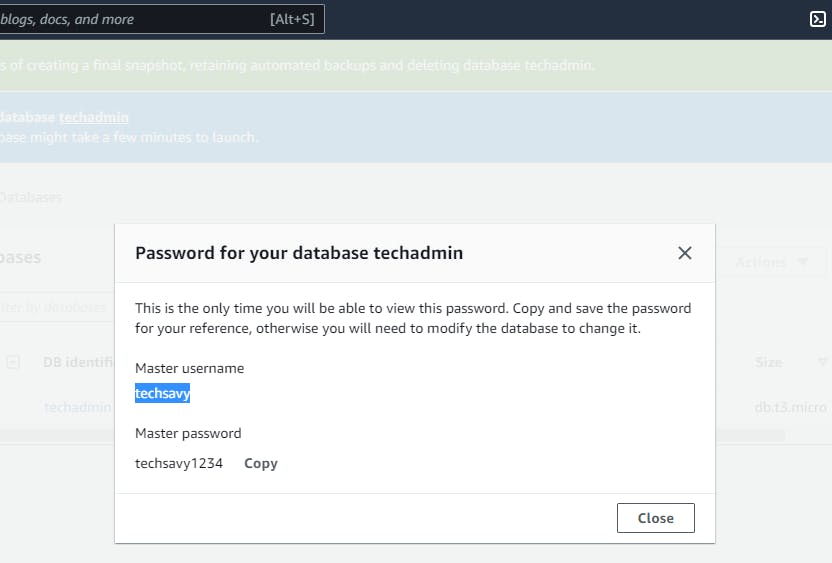
For the Username and Password go back to your AWS RDS Management console and click on View Credential Details
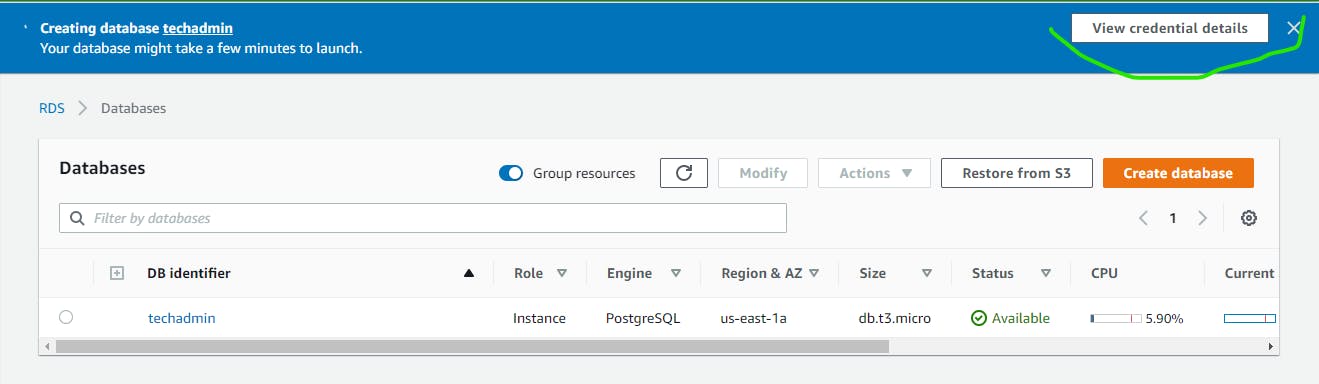
Next copy Username and Password
Go back to PgAdmin and paste what you copied from the AWS Console, then click save.
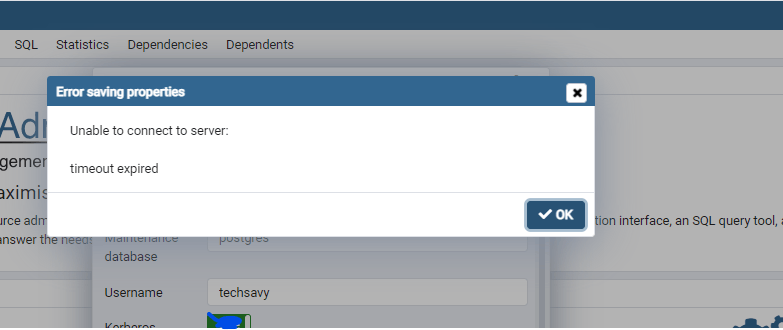
But you will find out it didn't go through but came up with a error message.
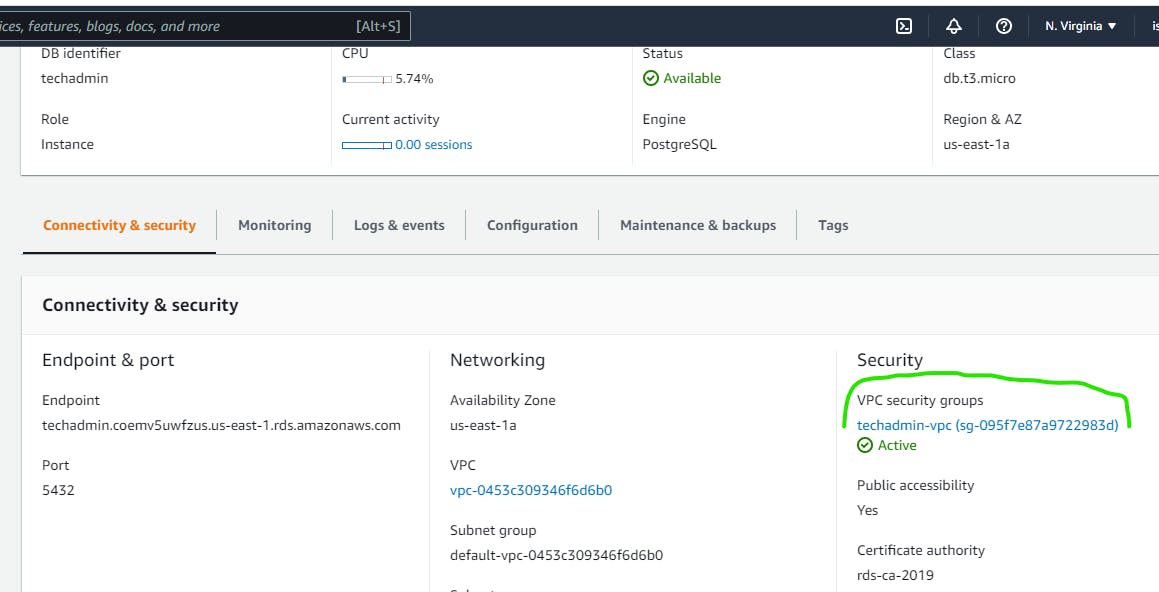
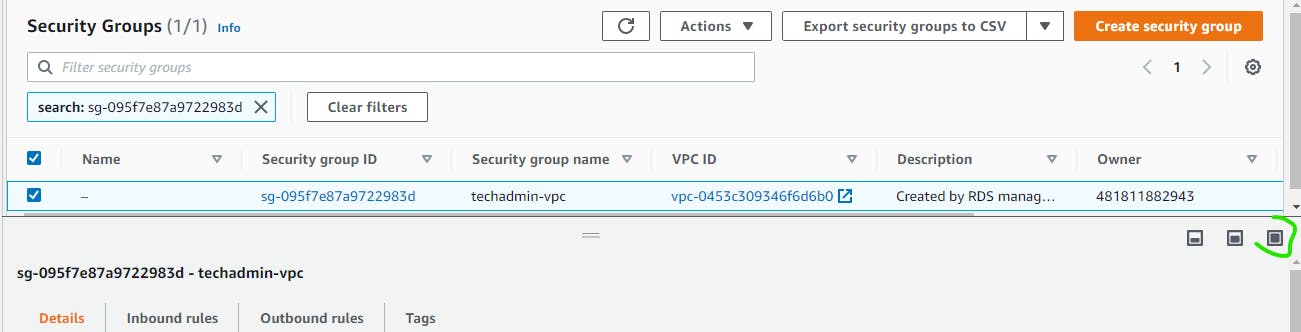
Go back to the console and click on DB identifier look under Security next click the link under VP Security groups
This will bring you to the VPC section of the AWS Console. Click on the colored circled below to help in expanding the screen. Then click on inbound rules.
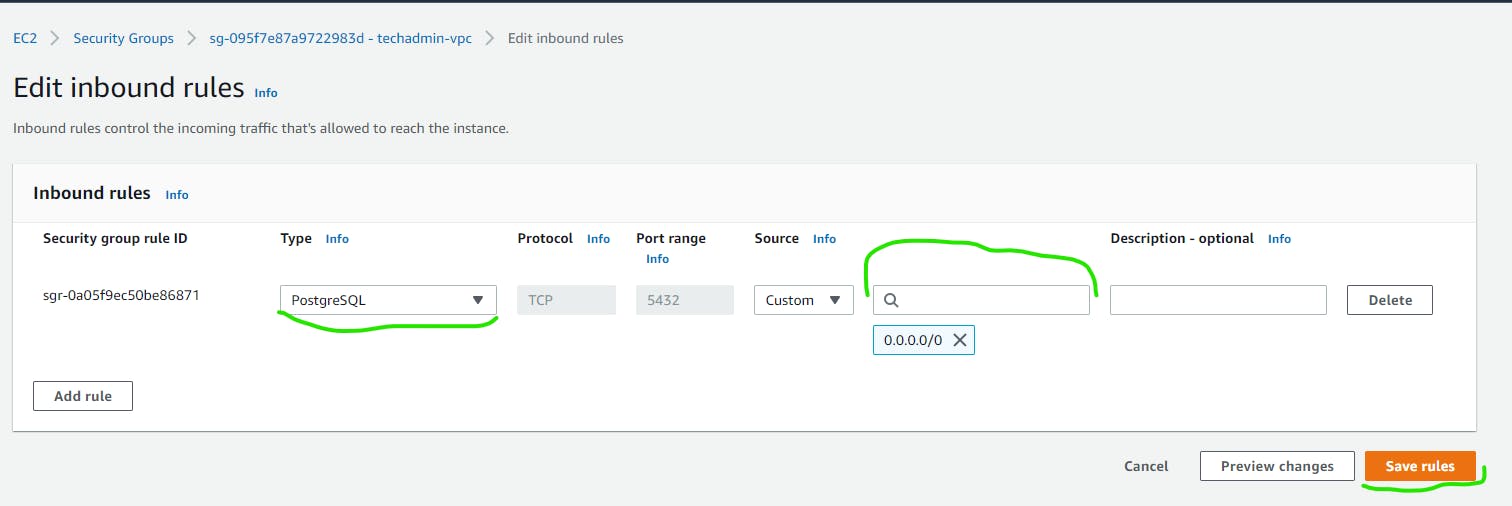
Next go the the right side of the screen and click on Edit inbound rules

Next go under Type, click and choose PostgreSQL
Then go to search bar after Custom, click and choose 0.0.0.0/0 when done kindly save rules.
Go back to PgAdmin and click on Save
Congratulations you've created your AWS Relational Database Service and linked it to PostgreSQL
Now you can import your data and query them and it will be stored in the cloud space which can be accessible anywhere in the world.
Endeavor to give yourself a Toms up