

What comes to your mind when you hear the word virtual? Basically, a logical representation of a physical thing. This applies to the computer world also, when something is said to be virtual, it simply means a logical representation of a physical thing created in a computer through software. To illustrate, take a look at the Ps4, the players aren’t the real players, but a virtual representation of the real players. Take a look at your photo album on your computer, it’s a virtual family. In the game “Temple Run” the person running and jumping is a virtual human being. In these illustrations, the football game, the family, and the person jumping and running are all created virtually using software on the computer.
Virtual machine, commonly abbreviated as VM is no different from other physical computer like laptop, desktop, smart phone or server, it has a CPU (Central Processing Unit), memory and so much more. While the part that makes up your computer (called hardware) are tangible and physical, VM are often thought of as a software implementation of a physical computer. It creates an isolated duplication of a real computer and allows us to perform operations as we perform operation on a real computer.
A VM is a software program that not only exhibits the behavior of a separate computer but also capable of performing task such as running it own programs and application like a separate computer. With a VM you can install one operating system in another operating system on same computer. To illustrate; you install a Linux operating system on your virtual machine on your windows operating system which happens to be your physical computer also known as the HOST.
Virtual hosts are able to share resources between multiple guests, or VM’s each with there operating system. The two basic type of VM are;
- System Virtual machine
- Process Virtual Machine
1. A SYSTEM VM
The System VM is also called hardware virtual machine. It is the software emulation of a computer system. It can also be referred to as a fully virtualized VM designed to be a substitute of a physical machine or acting as a substitute for the physical computer. To illustrate; you can install Windows XP/7/8 or Linux Ubuntu/Kali in Windows 10 operating system with the help of VM.
The system VM provides a platform for the execution of a complete operating system. It will create a number of different isolated identical execution environment in a single computer by partitioning computer memory to install and execute the different operating system at the time. Hardware resources are shared and managed, forming multiple environments on the host system. These very environments are isolated from each other but exist on the same physical host. It enables time-sharing among several single-tasking operating systems.

Bear in mind that to enable memory sharing between different virtual machine on one computer operating system, memory overcommitment system can be applied. With memory pages having identical content, the memory pages can be shared among multiple VM which are present on the same host. But this is highly useful for read-only pages.
Examples of system VM
I.  VMware
II. VirtualBox
I. VMware
The VMware has two versions. The VMware player which is a free and basic version. The second is the VMware workstation which is a paid application and often time used in enterprise setting. The work station application provides all the benefit you could have on a VMware player and also includes the feature to clone machines. The VMware can run but on Linux and windows operating systems.
II. VirtualBox
VirtualBox is an easy user friendly VM application. It has large number of features that makes sustaining multiple virtual machines simple. It also allows files, drive and peripheral sharing with the host computer. The VirtualBox can be used on various application such as Mac Operating System, Windows Operating System and Linux Operating System.
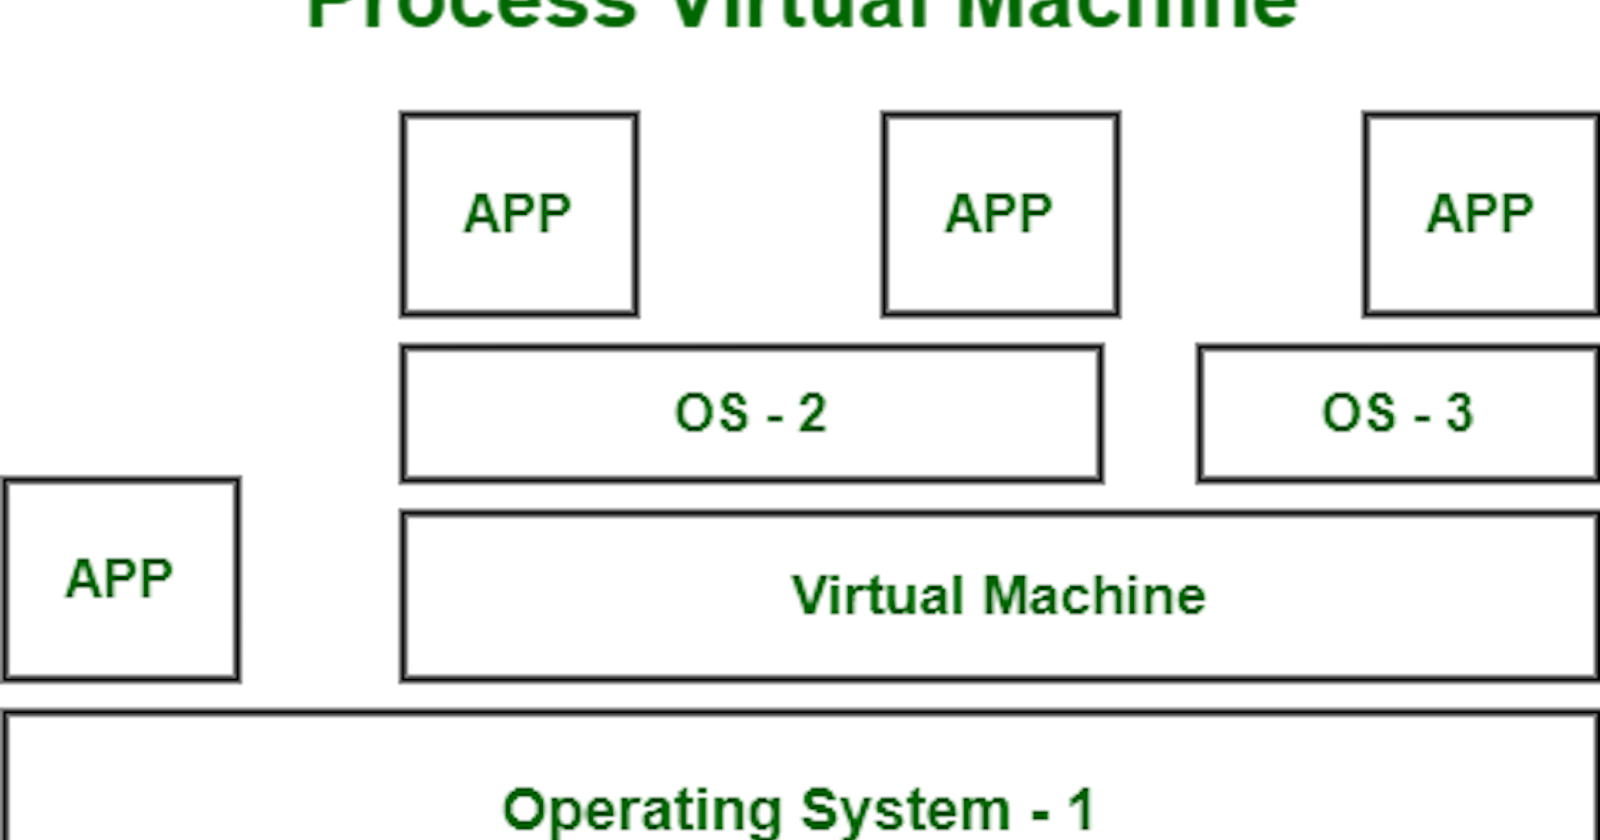
2. Process Virtual Machine
A process virtual machine is also called a language virtual machine or an application VM and sometimes it is been referred as Manage Run-time Environment. This type of VM runs as a normal application inside the host operating system, supporting a single process. The purpose of a process VM is to perform a platform-independent programming environment that abstracts the details of the underlying hardware or operating system and also allows a program to execute in the same way on any platform. Process VM are implemented using an interpreter for improving performance.

Example of Process VM are
I. Java Virtual Machine (JVM) II. Parrot Virtual Machine (PVM) III. Common Language Runtime (CLR)
I. JVM
JVM is an abbreviation of Java Virtual Machine. It allows any system to run Java application as if they were native system. It also allows other programs written in other languages as far as they are compiled to Java bytecode.
II. PVM
The parrot VM is designed to efficiently compile and execute byte code for dynamic language. It is a host to various languages implementing in various stages of completion, including TCC, JavaScript, Ruby, Lua, Scheme, PHP, Python, Perl 6, APL and .Net bytecode translator.
III. CLR
This is the virtual machine component of Microsoft .Net framework. It manages the execution of .Net. Just-in-time compilation convert the manage codes (compiled into mediate language code), into machine instructions which are then executed on the CPU of the computer.
Let create a virtual machine with the following steps;
Login to the Azure Portal

Click on Search bar at the top of your Azure portal, type Virtual Machine and click on it.


Click on Create > Virtual Machine


Subscription can be left on default - Azure Subscription 1. (just like the screenshot above.)
To create a new Resource Group click on Create New
Name the resource group Webservers
Next will be the Virtual Machine Name set to web01
The Region can be left at default but double check that it is the region that is closest to your location.
Availability options set it to No infrastructure redundancy required.
Security Type > Standard
Image use Windows Server 2019 Datacenter-Gen1

You might not see Gen1 so click on Configure VM generation > Generation 1 then go back to the image and use Windows Server 2019 Datacenter-Gen1.
Size use Standarrd_DS1_v2 - 1 vcpu, 3.5 GiB memory
If you do not see this size, you can choose the size in the standard section with the closest specifications.
Username use adminblock
Password use a password that meets the given requirements
Inbound Port Rules leave it at Allow Selected Port
Select inbound ports click on HTTP (80) HTTPS (443) RDP (3389)

Next is licensing Don't change options for the licensing.
Click on Review + create.

Next click on Create.

This might take a few seconds but once provisioning is complete you will get a page that says something along the lines of
Your deployment is complete.

Pat yourself on your back for getting to this point, You deserve it.
Next click on the button Go to resource.

Next On the top left click Connect and select RDP.

To Connect with RDP:
IP address used Public IP address (102.133.184.189)
Port number is set to 3389.

Next Click on Download RDP file and open the file.

Next input your Password, the password that you created within the Azure Portal. (If this doesn't work, not to worry check the next screensho
 ).
).

Depending on your network you may need to click on More Choice then click on Use a different Account input the login credentials which you use on your Azure Portal: adminblock as the Username and the Password you setup.


Next click connect and yes to accept the certificate.

Ta-Da! you've created your first Virtual machine. Please give yourself a pat at the back

Now lets create a Webserver
Login and Server Manager should be open. If not, you can click on the icon at the bottom middle
Next click on Add roles and features

Follow the wizard and leave all the settings in the default settings, keep clicking next until you get to Server Roles.
Server Roles select Web Server (IIS).
Select Include management tools (if applicable)
Click Add features.


Click Next . The minimal features should already be selected and adequate.

Click Next till you get to Role Server
Scroll down, select IIS Management Console in Management Tools, then click Next

Select Restart the destination server automatically if required, click on Yes then click Install.

The installation will take a few munities. Once the installation has completed, click Close.


Go to the main menu for you computer and search for inetmgr and open Internet Information Services (IIS) Manager

Click web01 (web01/iisadim) to open up the pane.
Click the arrow next to sites to access the default website.

Right click on the Default website. Select Manage Website. Select Advanced Settings.

Look for and copy the physical path which should be some thing like %SystemDrive%\inetpub\wwwroot

Open File Explorer

Click on This PC > Windows (C)

Click on inetpub

Click on wwwroot


Right click on the empty space and select New then click on Net Text Document.

Enter the following text with no markup into the text document.
"Welcome to my initial web page"

Click File and save as index.html,
Change the Save as type as All Files,.
Click Save,


This will take precedents over the adminblock file and you should now see this page as your home page when you go to the public IP address
Go to the main Menu of your Virtual Machine and click on internet explorer

Impute the Public IP address from your RDP and click enter. You should see the home page you created with the text "Welcome to my initial web page"

If you got to this point, I want to say a big Well Done.

You've created your first Virtual machine and webserver. Drop a comment and tell us how the experience was for you.